1. PREREQUISITE
To get started with your new solution, you will need:
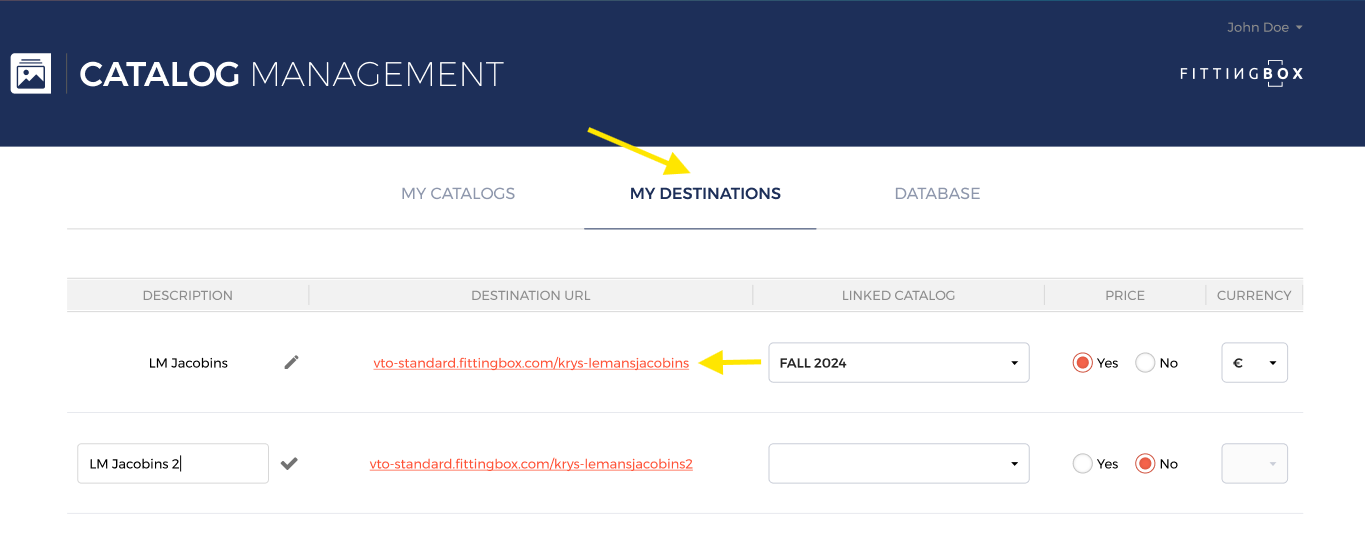
- The Destination URL of your Standard for Website (provided in the delivery email); I.e :
https://vto-standard.fittingbox.com/demodemo
You will find the Destination URL also in your Dashboard→ Destinations URL tab on Catalog Management Platform
- Your credentials (provided in the delivery email too)
- A WIFI connection and access to the Internet
2. YOUR CREDENTIALS
In order to access your Backoffice and manage your catalogue of virtual frames, you will need
your credentials:
- Your login (i.e.: email@email.com);
- Your confidential password.
Caution!
Do not forget your credentials, they could be useful in the future. They are strictly personal.
Do not disclose them.
3. INTEGRATION GUIDE
Fittingbox Virtual Try-On module can be integrated in 2 different ways:
- Directly on your website: we call it « Iframe »;
- Or as a Pop-in window, that can open from a link, a tab or a visual push.
You will have to choose the right integration option depending on your choice of
module.
1) « Iframe » integration
Here are the HTML codes to be integrated:
<iframe width="100%" height="HEIGHTOFTHEMODULE" src="https://https://vto-standard.fittingbox.com/demodemo" frameborder="0" allow="camera"></iframe>
With variables :
- HEIGHTOFTHEMODULE: this is the height you want to set up the module at; (Please note that we recommend it to be superior to 590 pixels.)
- Destination URL: this is the module variable provided in the delivery email.
2) « Pop-in » integration
Here are the HTML codes to be integrated:
- In your Head tag
<link rel="stylesheet" href="fbxPopUp.css" type="text/css" />
- In your Body tag
<button id="fbx-modalBtn" value="https://vto-standard.fittingbox.com/demodemo" >Show</button>
<div id="fbxModal">
<div id="fbx-simpleModal" class="fbx-modal-overlay">
<div class="fbx-modal-content">
<div class="fbx-modal-header">
<span class="fbx-closeBtn"></span>
</div>
<div class="fbx-modal-body">
</div>
</div>
</div>
</div>
<script type="text/javascript"src="fbxPopUp.js"></script>
With the variable :
➔ Destination URL: this is the module variable provided in the delivery email and also on your dashboard Destinations on Catalog management
4. HOW TO LAUNCH STANDARD FOR WEBSITE
Before starting to manage your virtual catalog, follow this simple list to check if you
are good to go:
1. Make sure you are connected to the Internet;
2. Make sure your camera is connected to the screen;
3. Open your web browser;
4. Copy-Paste your URL in your browser’s research bar (provided in your delivery
email).
Tips
If you wish to go the extra mile, you can automatically launch your solution when
you open your browser.
To do so, please follow this guideline:
https://support.google.com/chrome/answer/95314?hl=com