How to create and manage a catalog ?
The Catalog Management platform consists of three tabs:
- My Catalogs: A tab that provides an overview of all the catalogs you have created and allows you to create and manage your catalogs.
- My Destinations: A tab that allows you to view and manage the association of destination URLs with the catalogs you want to make visible.
- Database: A tab that lets you create your catalog by searching for and selecting items available in the database.
Log in to the Catalog Management Platform via the following link:
https://catalog-management.fittingbox.com
Use the credentials you received by email from FittingBox.
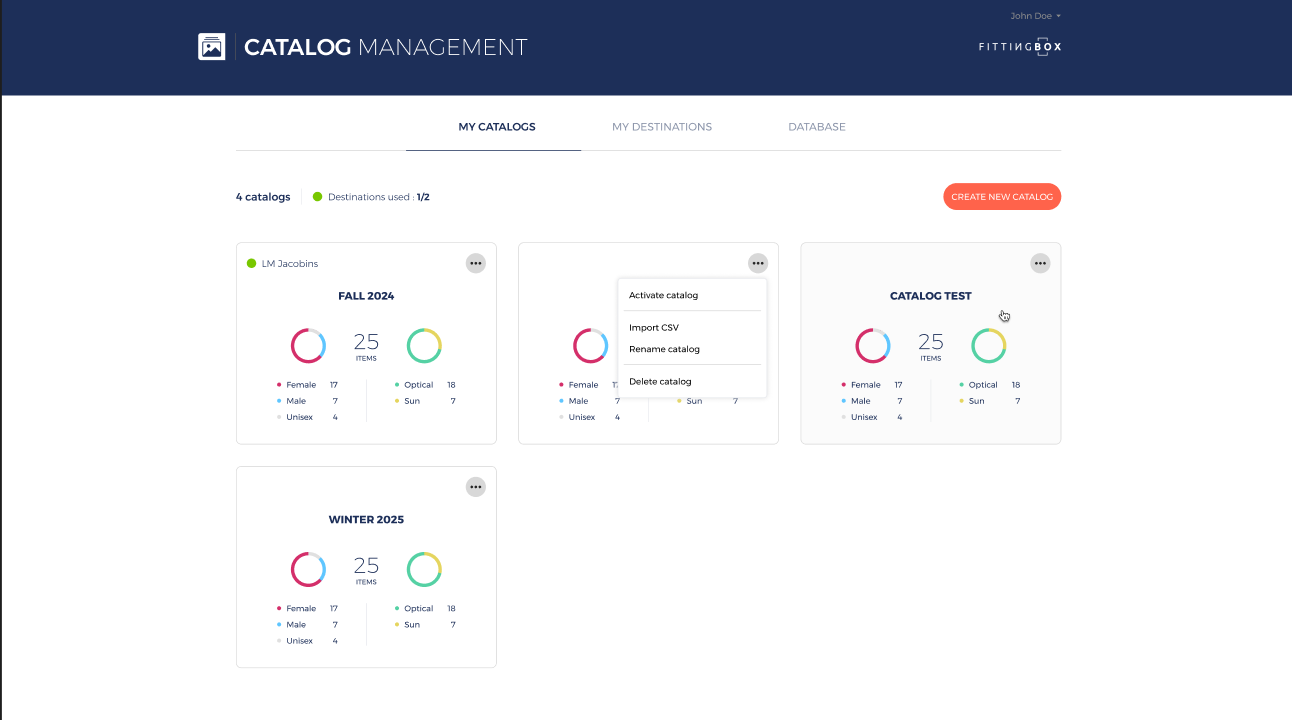
On the MY CATALOGS dashboard, you will see:
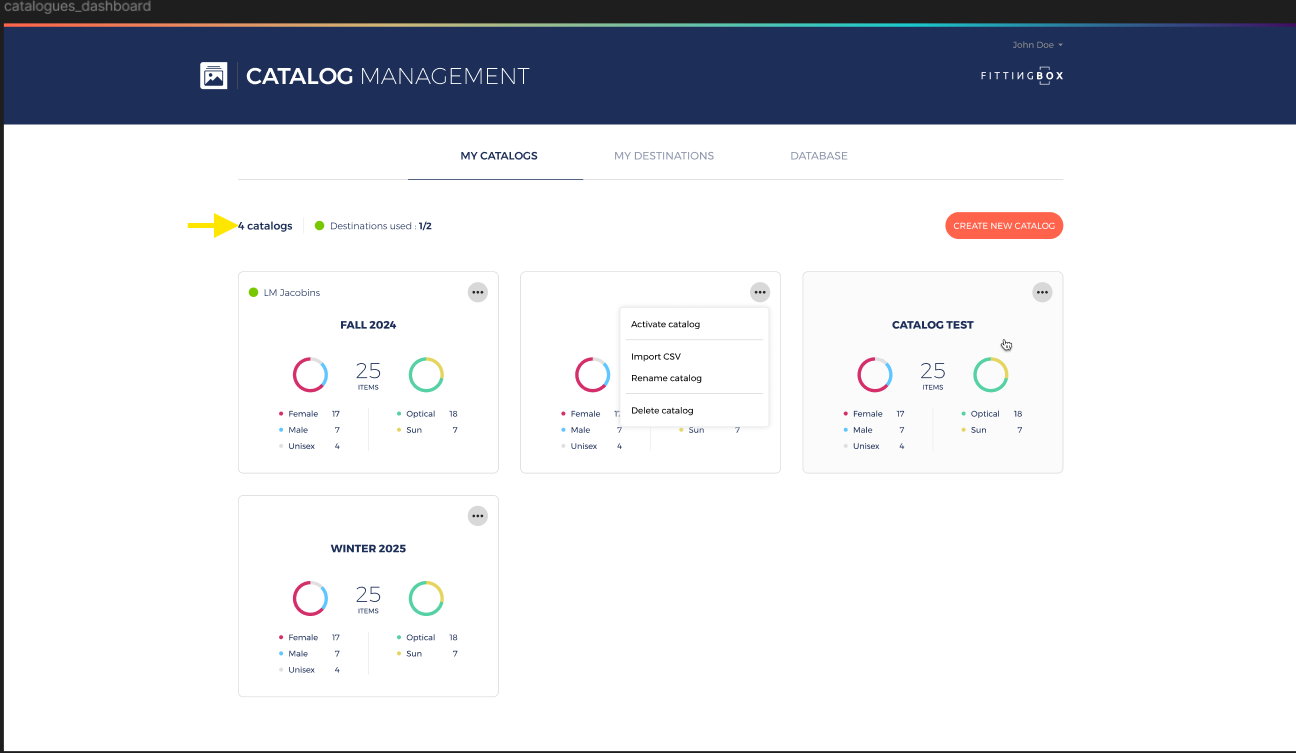
- The total number of catalogs created.
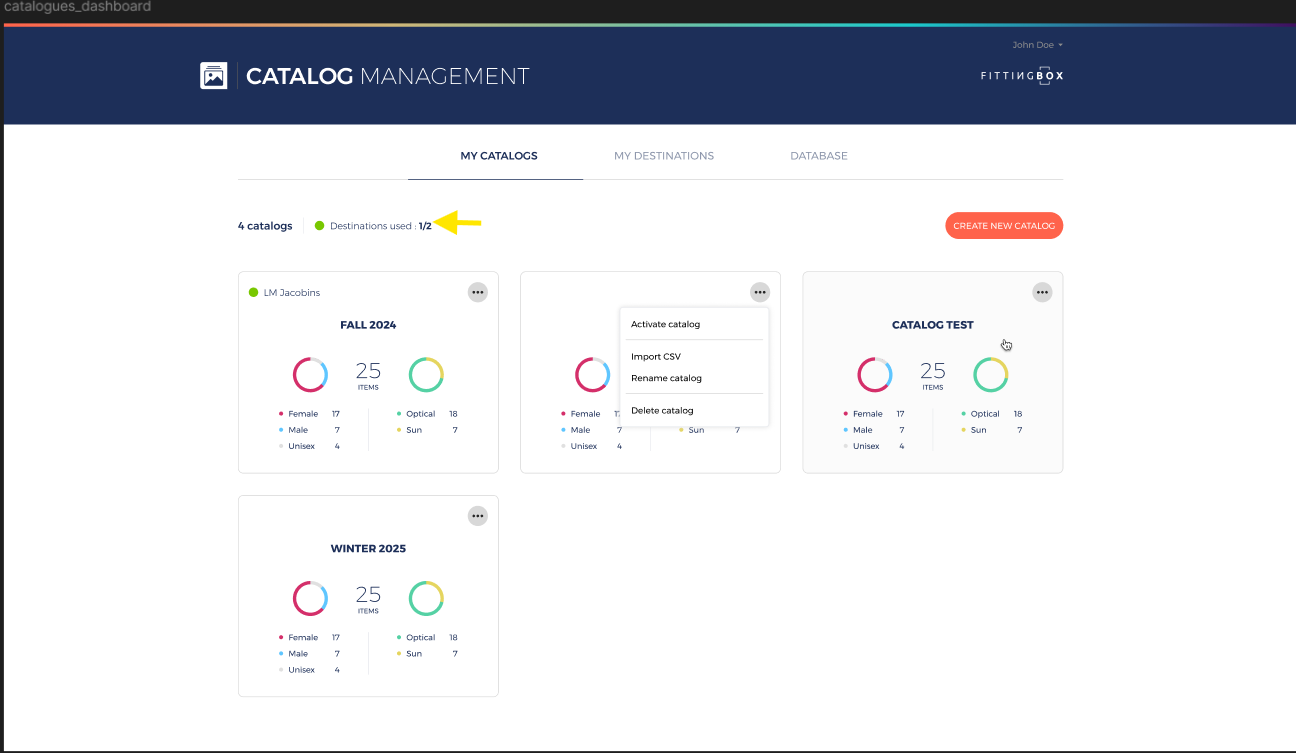
- The total number of destinations used versus the total available destinations.
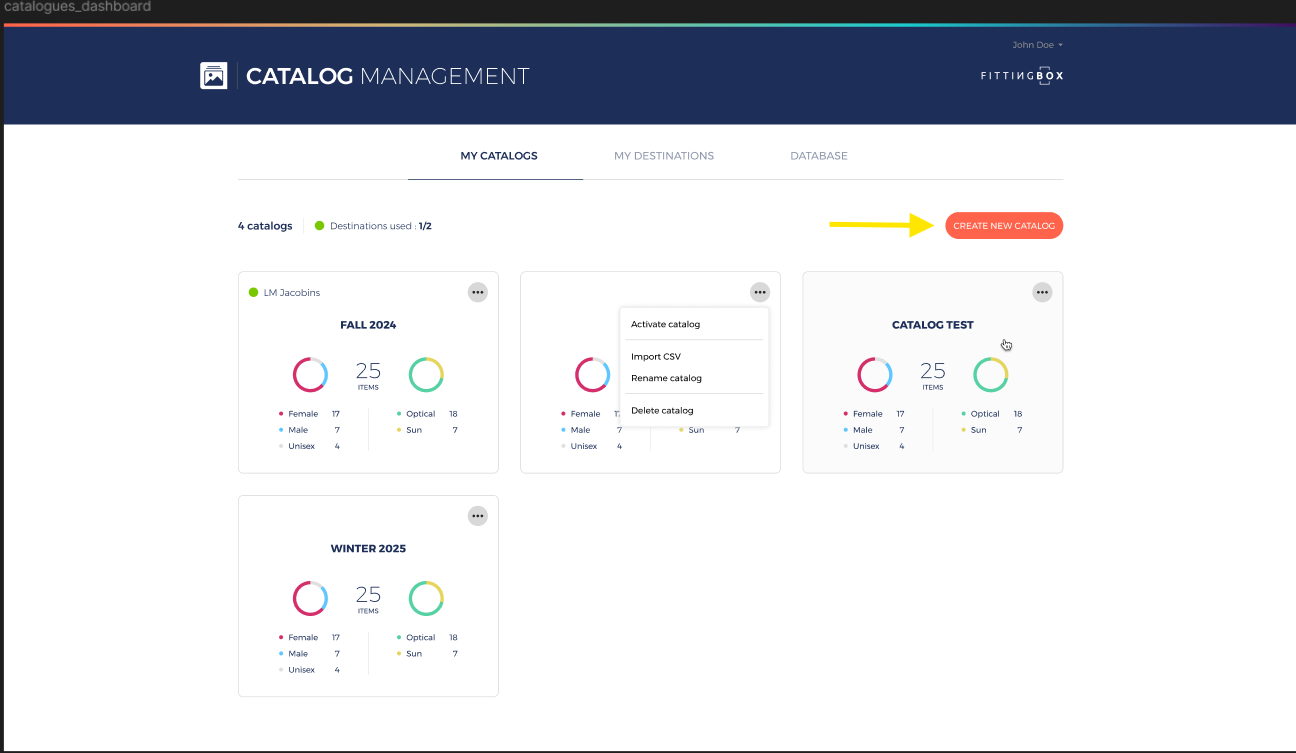
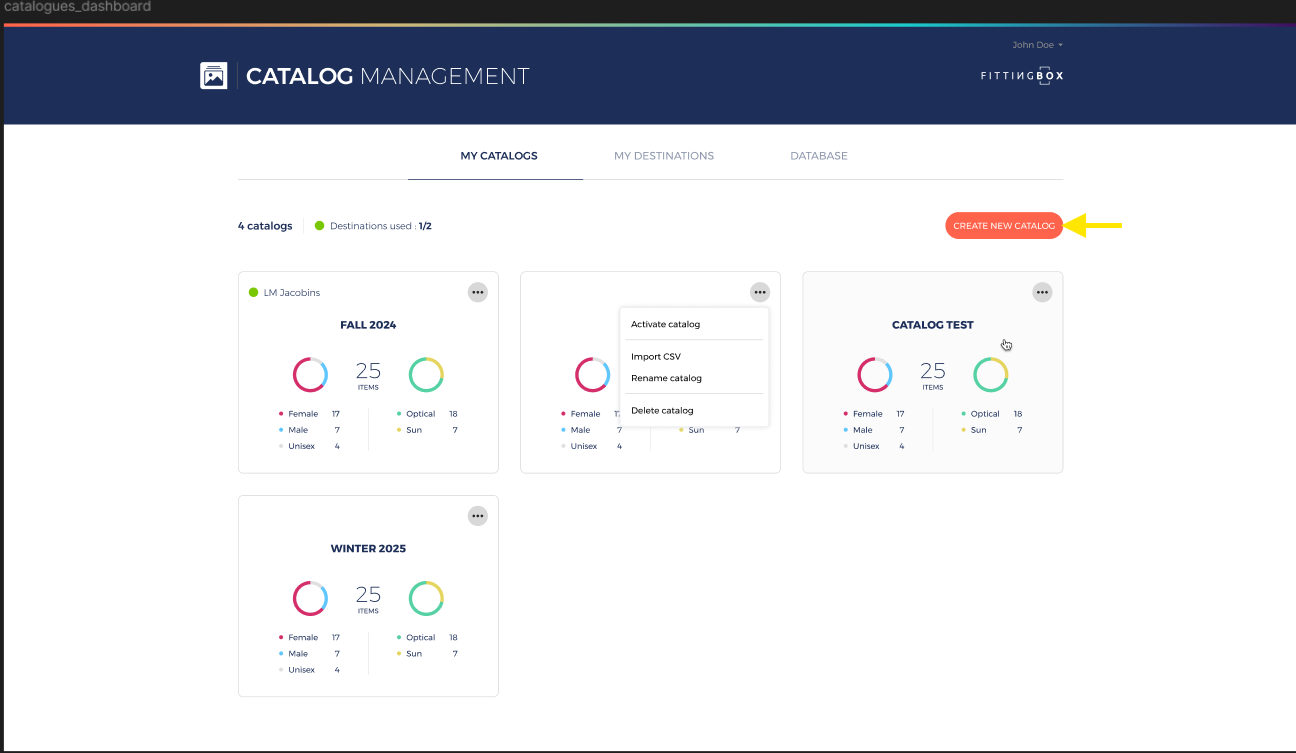
- A CREATE NEW CATALOG button.
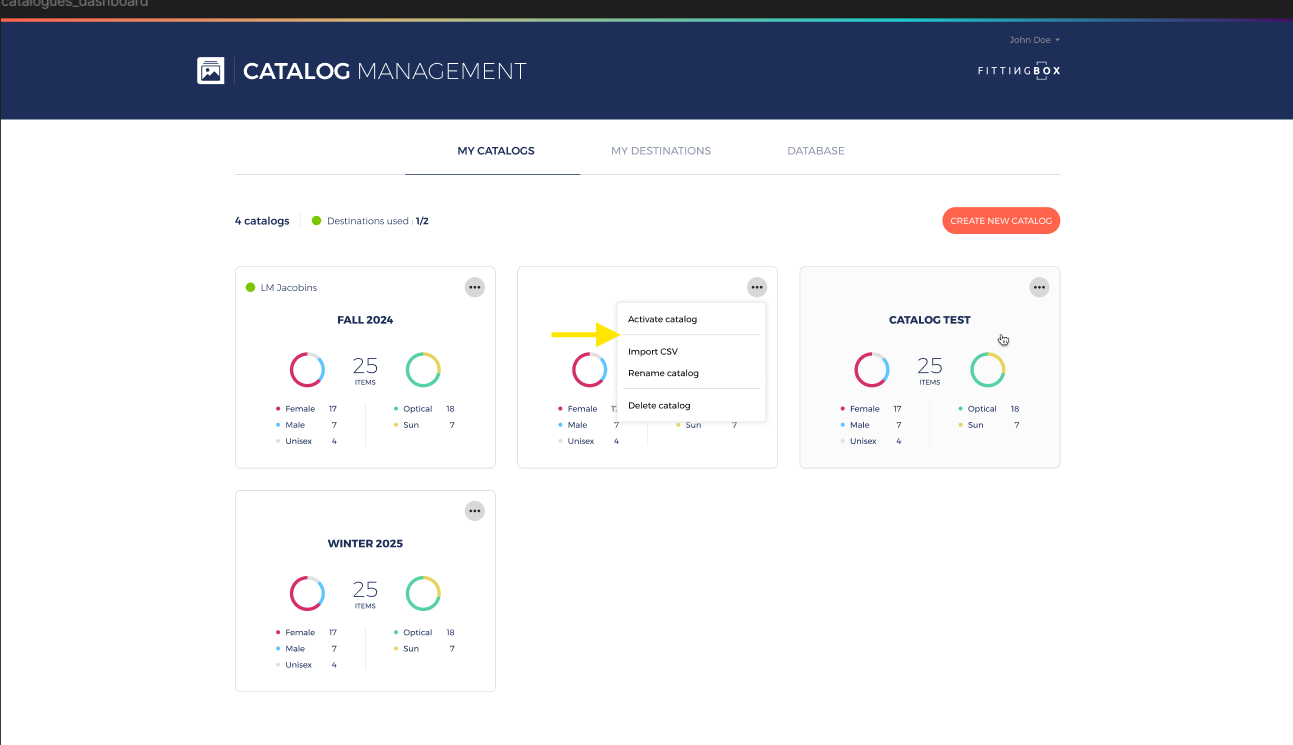
- Cards representing your catalogs, with each card showing:
- The catalog description from the MY DESTINATIONS tab.
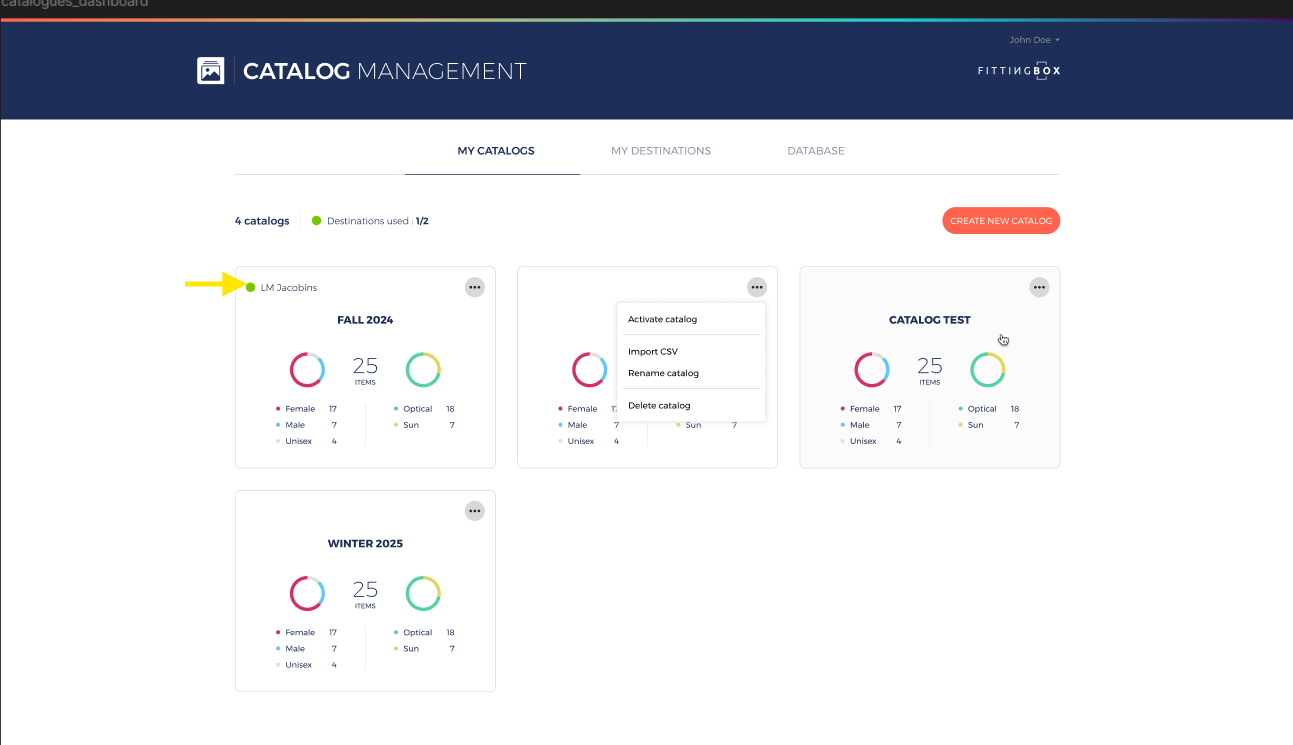
- An action menu in the top-right corner with options: Activate catalog, Import CSV, Rename catalog, and Delete catalog.
- The catalog name.

-
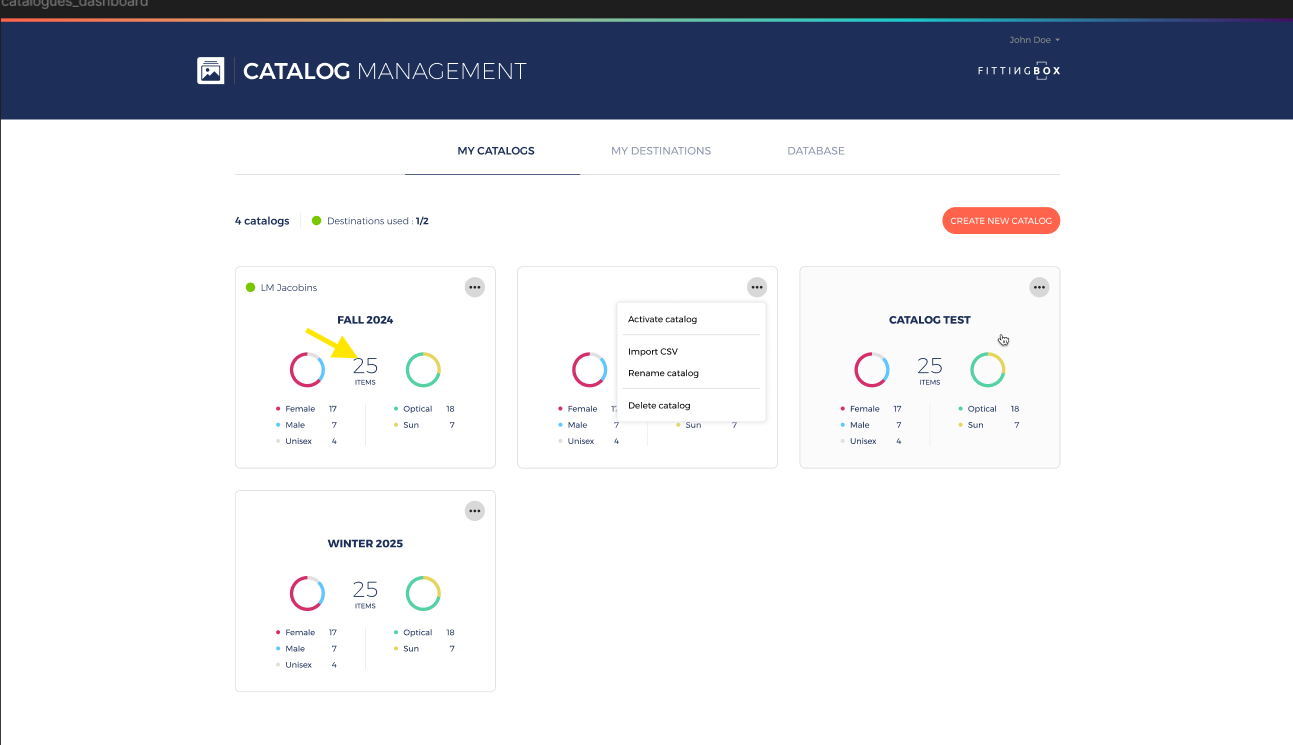
- The total number of items in the catalog.
-
- Pie charts showing items by gender (Female, Male, Unisex) and by asset type (Optical, Sun).

HOW to create a catalog?
- Click the CREATE A NEW CATALOG button.
- A popup will appear titled NEW CATALOG.
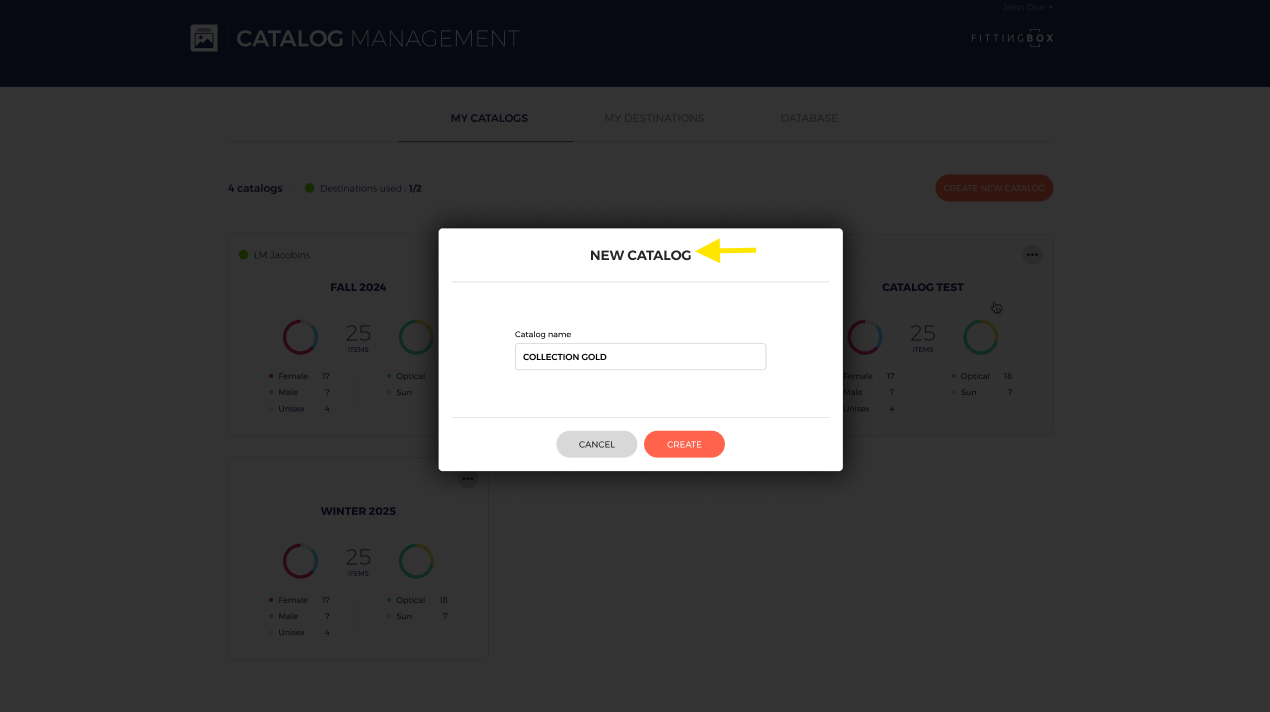
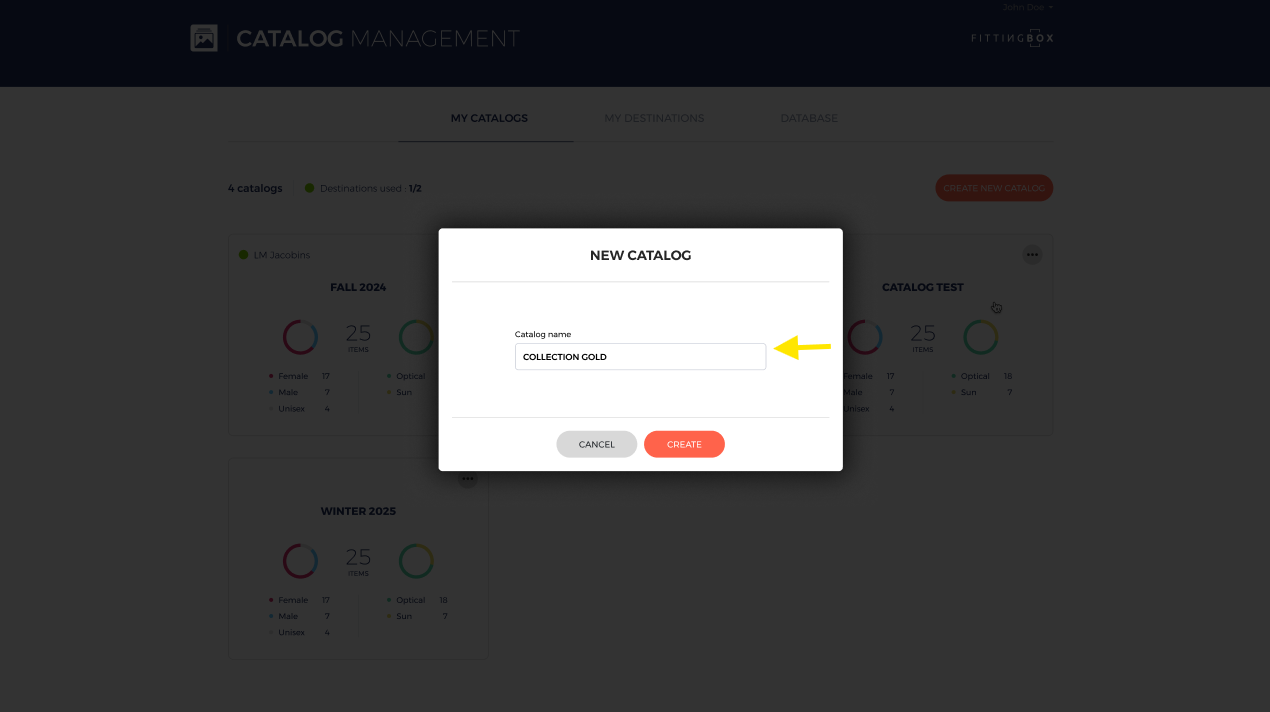
- Enter a catalog name in the input field.
- You can either click CANCEL to discard or CREATE to finalize the catalog.

The catalog name is mandatory. The CREATE button will stay disabled until a valid catalog name is entered.
After creating your catalog, you will be redirected to the catalog details page in order to fill your catalog with the items you want.
You can also acces this page by clicking on the catalog card that will be created once you have clicked on Create in the popup.
When the Catalog Details page displays, you will see:
- A back arrow button to return to the MY CATALOGS dashboard.
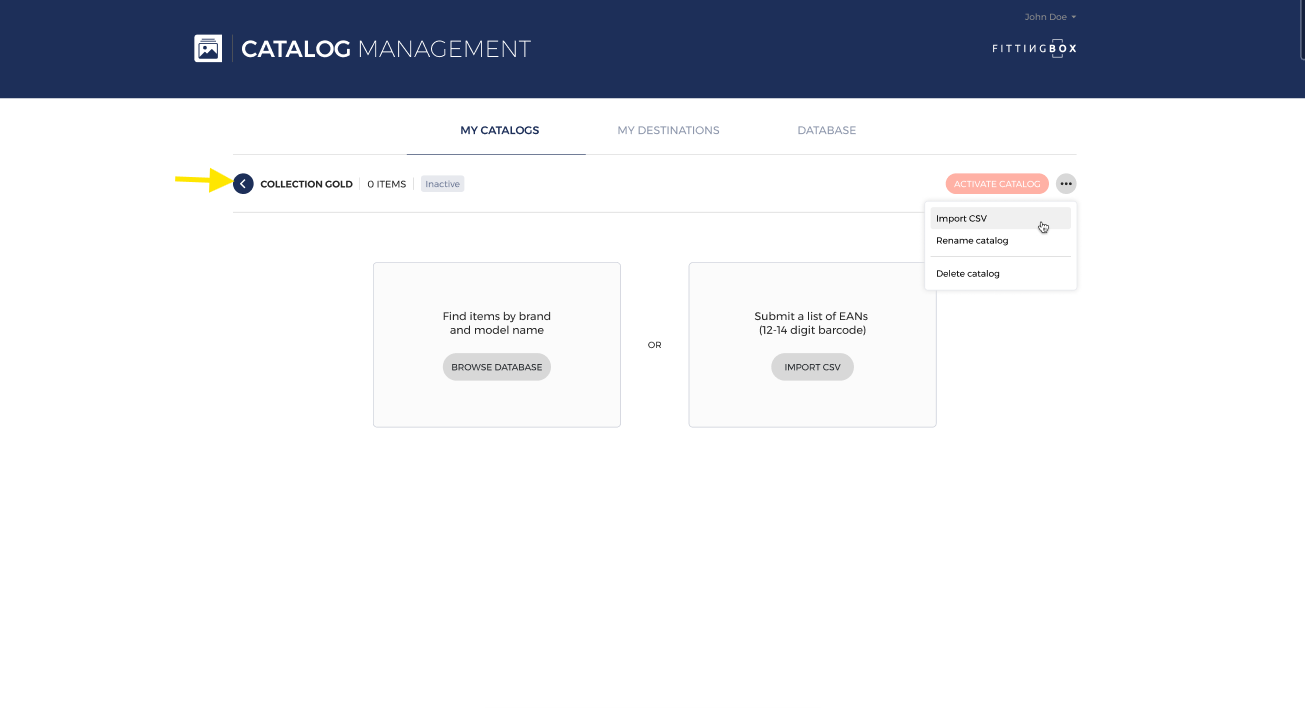
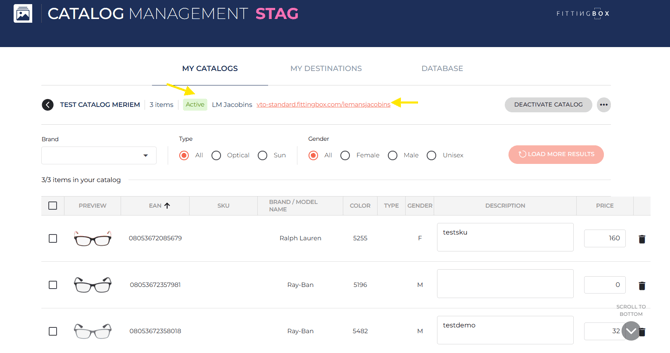
- The number of items in the catalog.

- The catalog’s status (Active or Inactive).
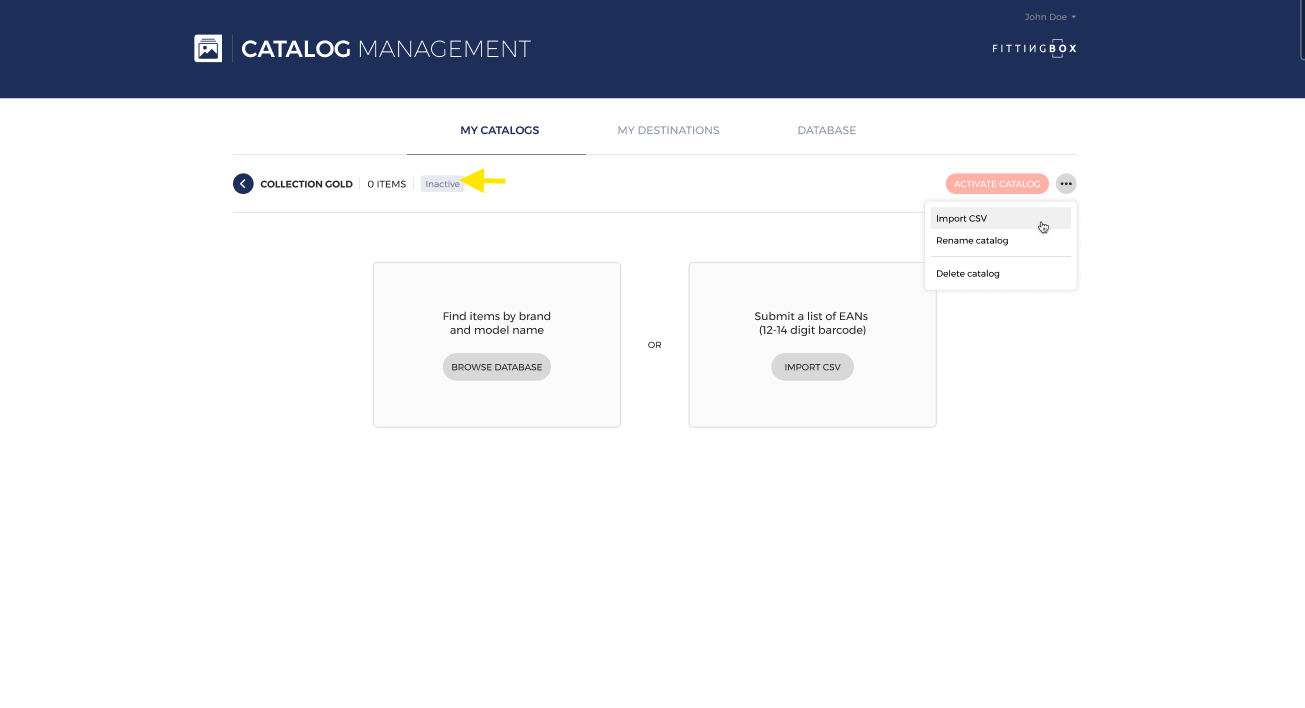
- An ACTIVATE CATALOG button, which remains disabled until at least one item is added.
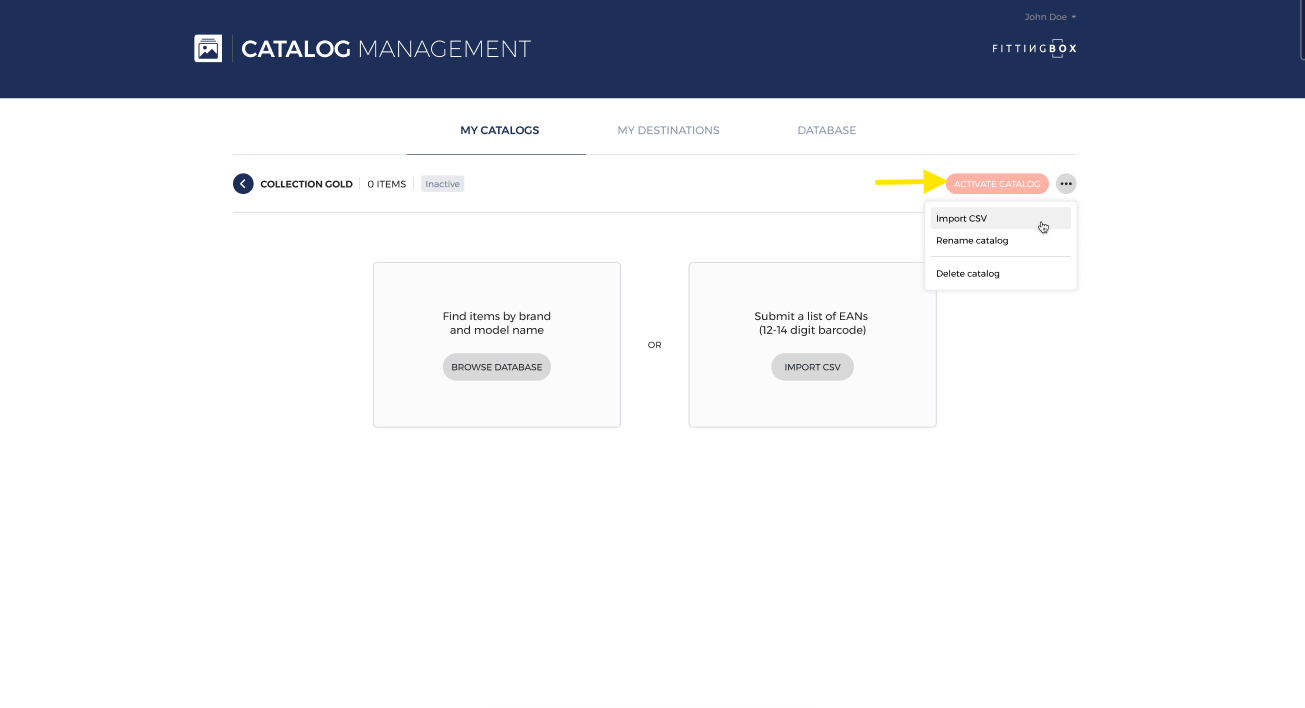
- An action menu with options to:
- Import CSV
- Rename Catalog
- Delete Catalog
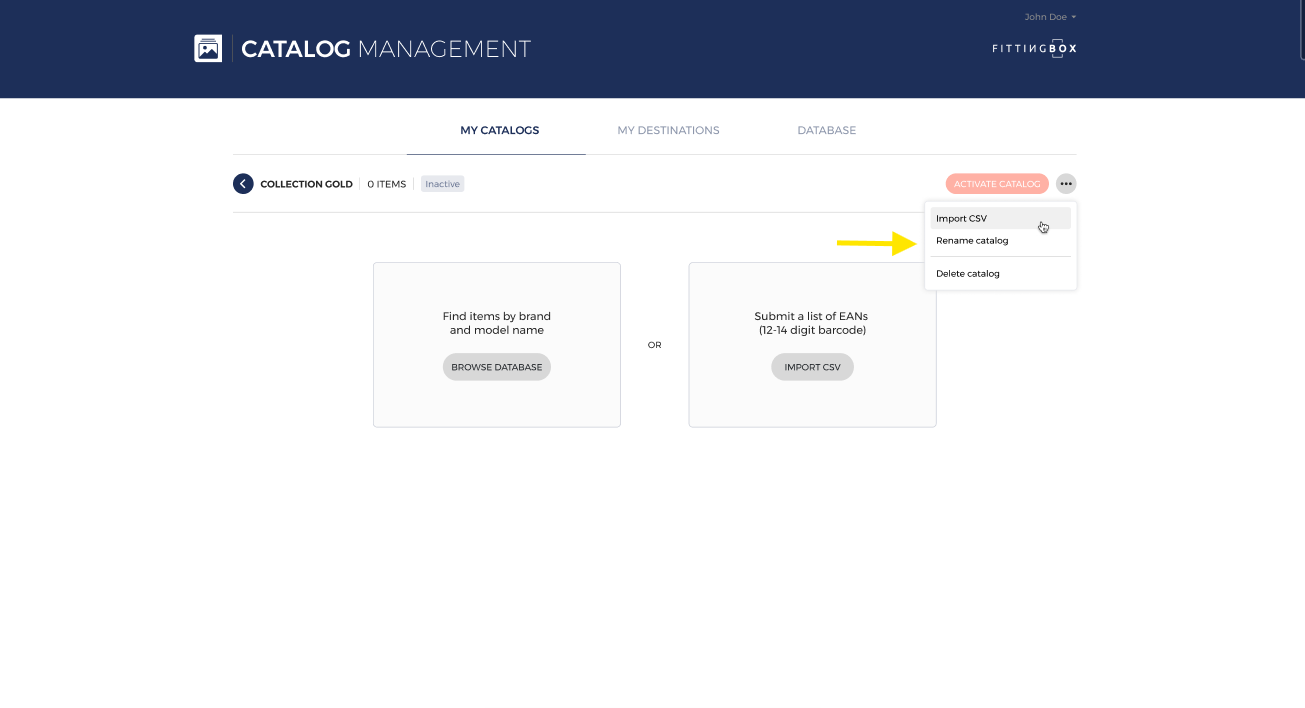
Adding Items to a Catalog
-
On the Catalog Details page, locate two cards:
- Left: "Find items by brand and model name" with a BROWSE DATABASE button.
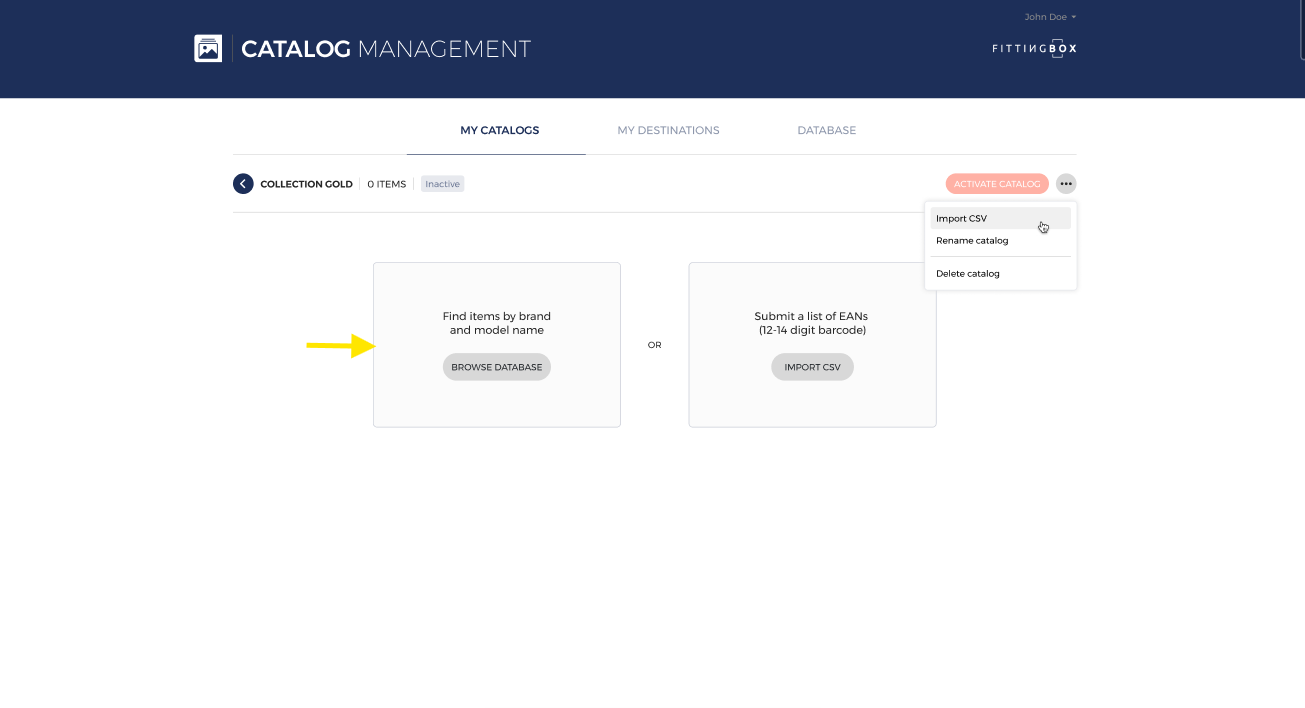
- Right: "Submit a list of EANs" with an IMPORT CSV button.

How to create a catalog by importing a CSV?
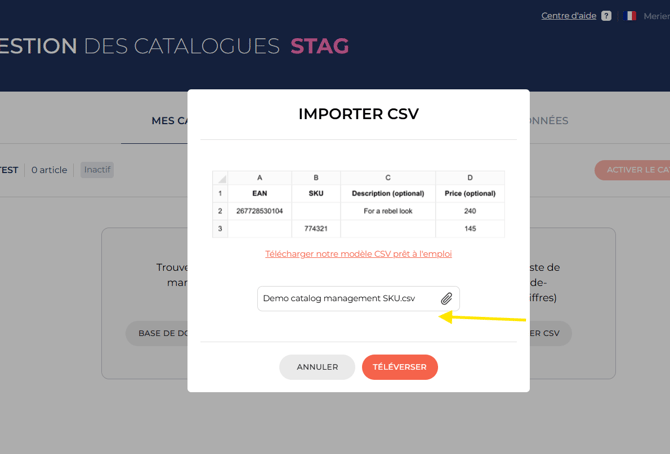
Click IMPORT CSV to upload items. A popup will appear:
Click on the link to download the CSV template to fill in.
Mandatorty fields in the CSV :
EAN: a maximum of 14 characters
Or SKU: only letters and/ or numbers
Optional fields:
Description
Price
Please note that only one of the two, either the EAN or the SKU, is mandatory.
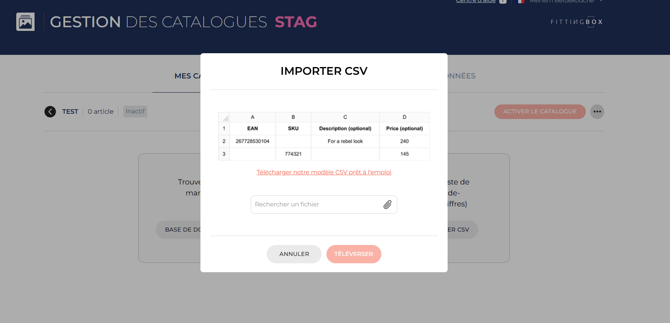

Click on the NEXT button to proceed with the import.
Next button is enabled only after a valid CSV is uploaded
If the uploaded CSV is incorrect, you’ll see an error message:
"The CSV file is incorrect. Please check the format and try again. EAN must be a maximum of 14 characters."
Or,
“The SKU can contain both letters and numbers”
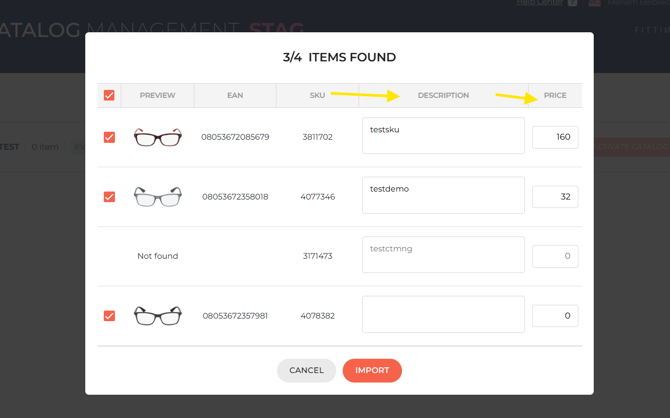
After clicking NEXT, another popup will appear showing you the items found in the database.
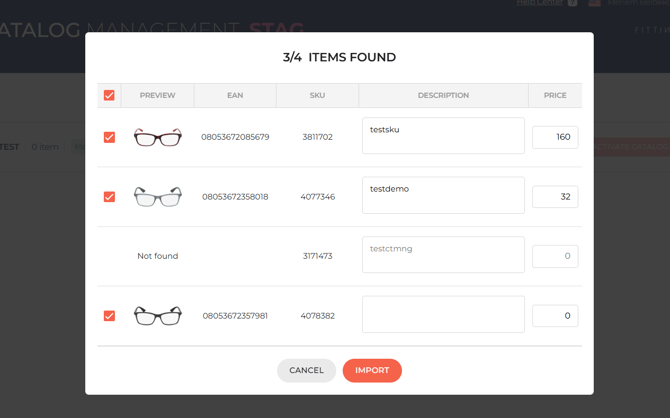
On this popup, you can:
Edit the Description
Edit the price
Note that changes are saved automatically.
Use the check boxes next to "Preview" to select the items that you wat to import.
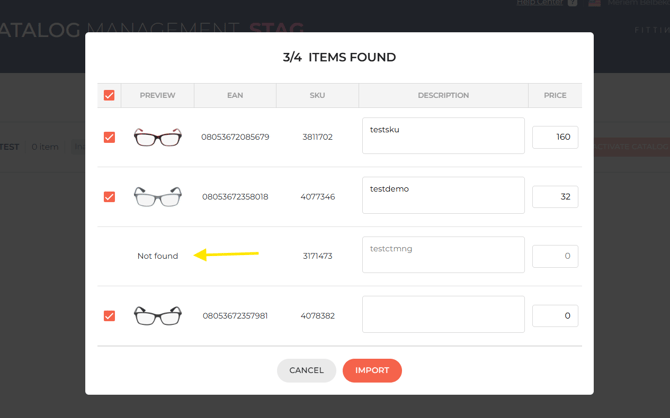
EANs not found in the database will be marked as "not found".
Click on Import to continue.

After importing the desired items, you will be redirected to your items dashboard, where you can view the following information:
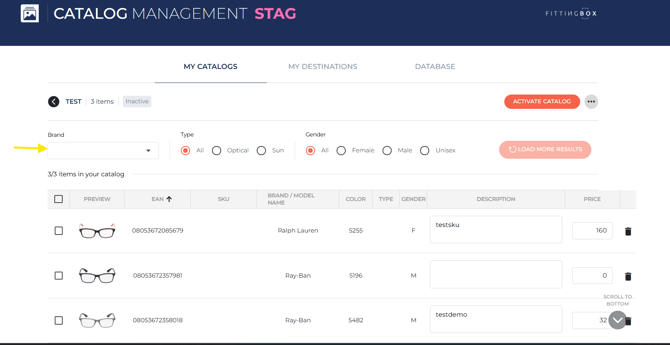
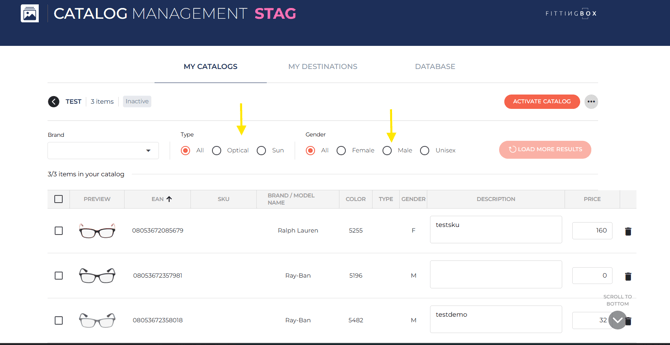
Type filter: All / Optical / Sun
Gender filter: All / Female / Male / Unisex
Items dashboard: containing a thumbnail of the item, its ID, brand/model name, color, type, gender, description, price, and a trash icon allowing you to delete the item.
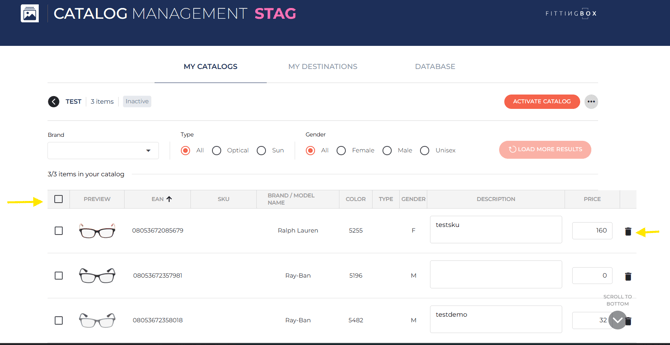
- The description and price listed in this table are those you entered in the popup for the found items.
- You can modify them at any time.
- Changes are saved automatically.
After verifying your items, click on ACTIVATE CATALOG to make it active.
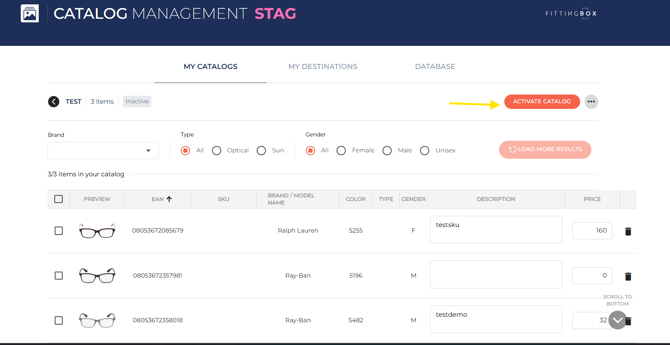
After having clicked on ACTIVATE CATALOG, a popup will appear in which uou should select a DESTINATION URL.
The already used DESTINATION URLs will appear in the dropdown list but will be grayed out and non-clickable.
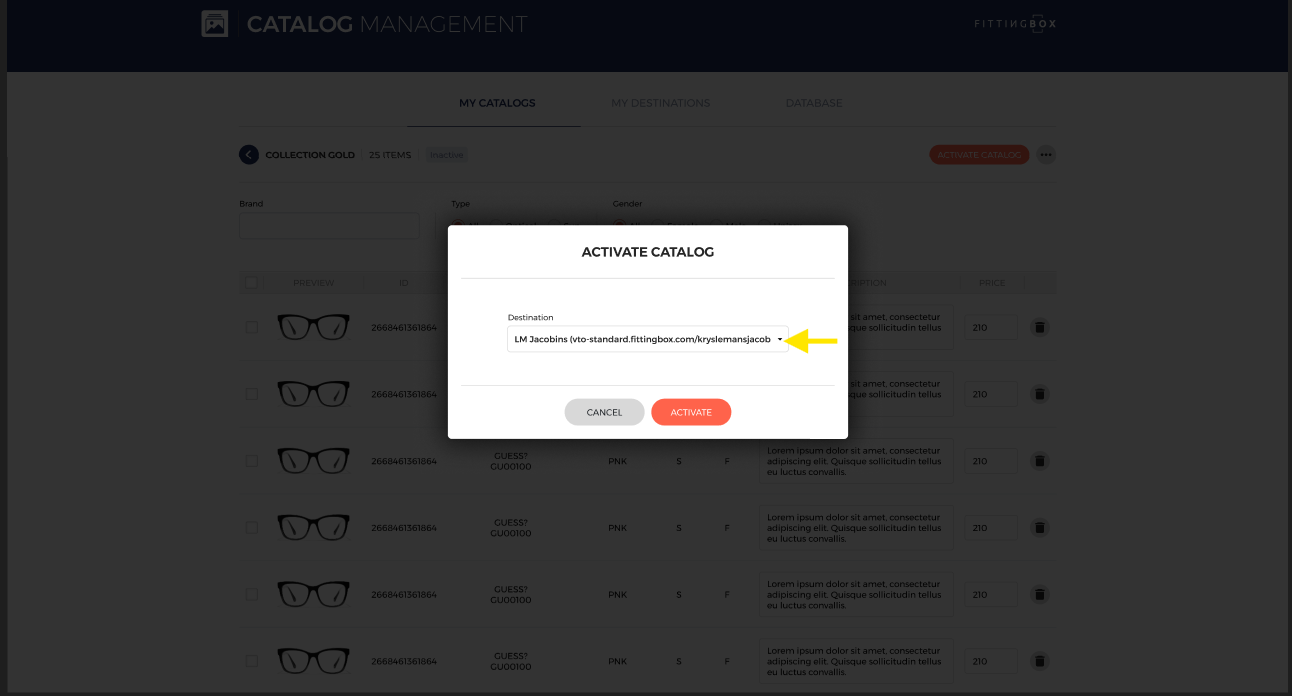
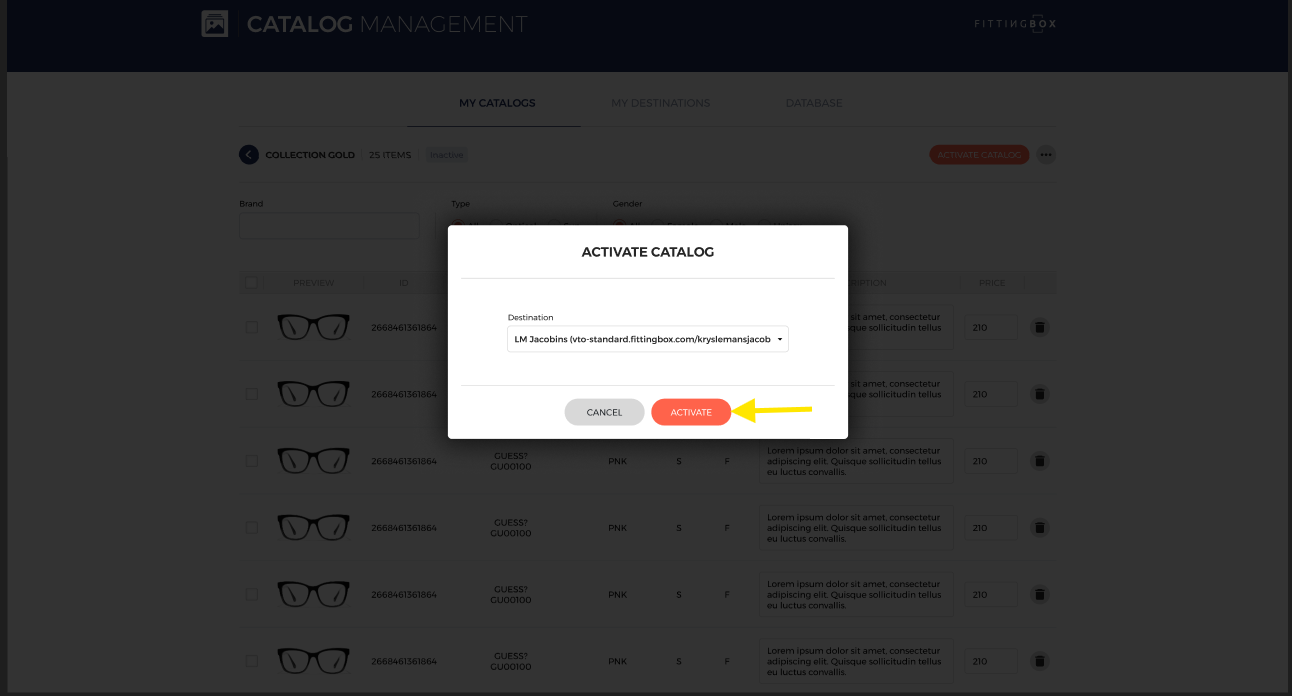
Click on ACTIVATE to make your catalog active.
The ACTIVATE button remains inactive if no DESTINATION URL has been selected.
After clicking on ACTIVATE in the popup, you will be redirected to the items dashboard, and on this screen, the catalog status will be "Active" and the DESTINATION URL will be displayed next to the status.
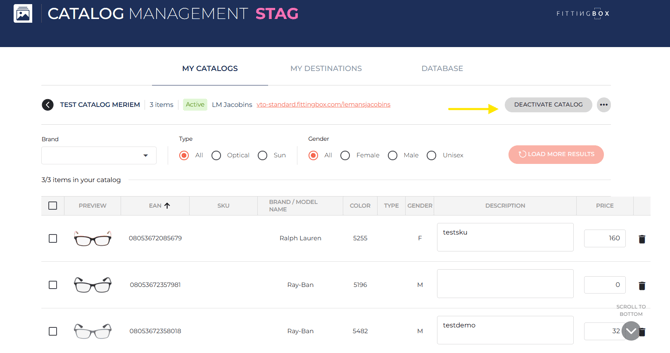
If you want to deactivate your catalog, click on DEACTIVATE CATALOG.
If you want to edit an already activated catalog, please use the action menu to import a CSV. The items listed in the new CSV will be added to the active catalog. The new CSV will not overwrite the previously imported items.
How to create a catalog by manually searching for items in the database?
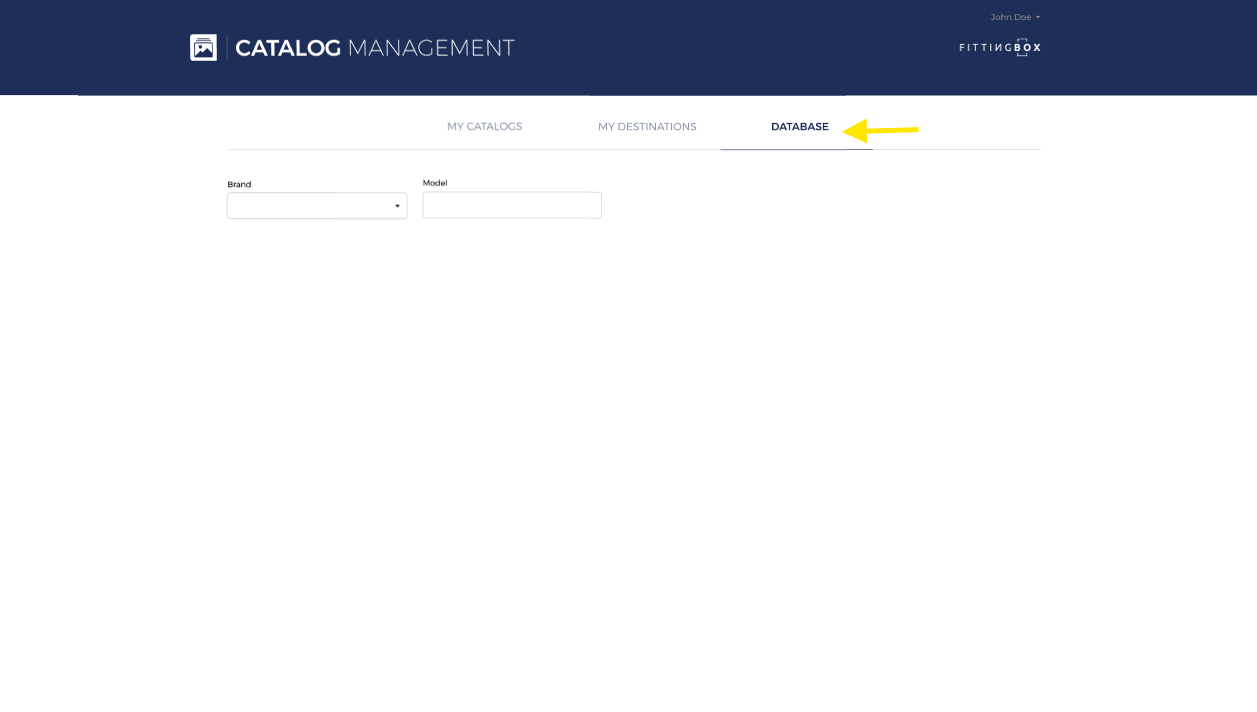
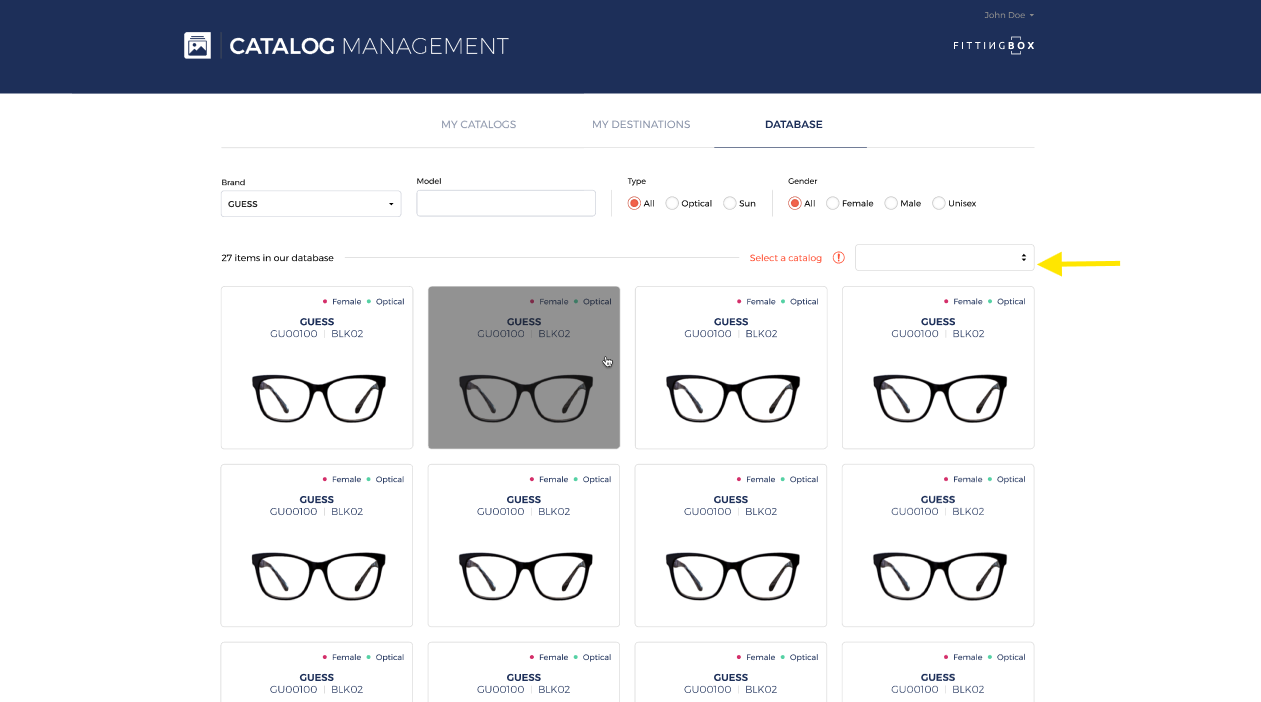
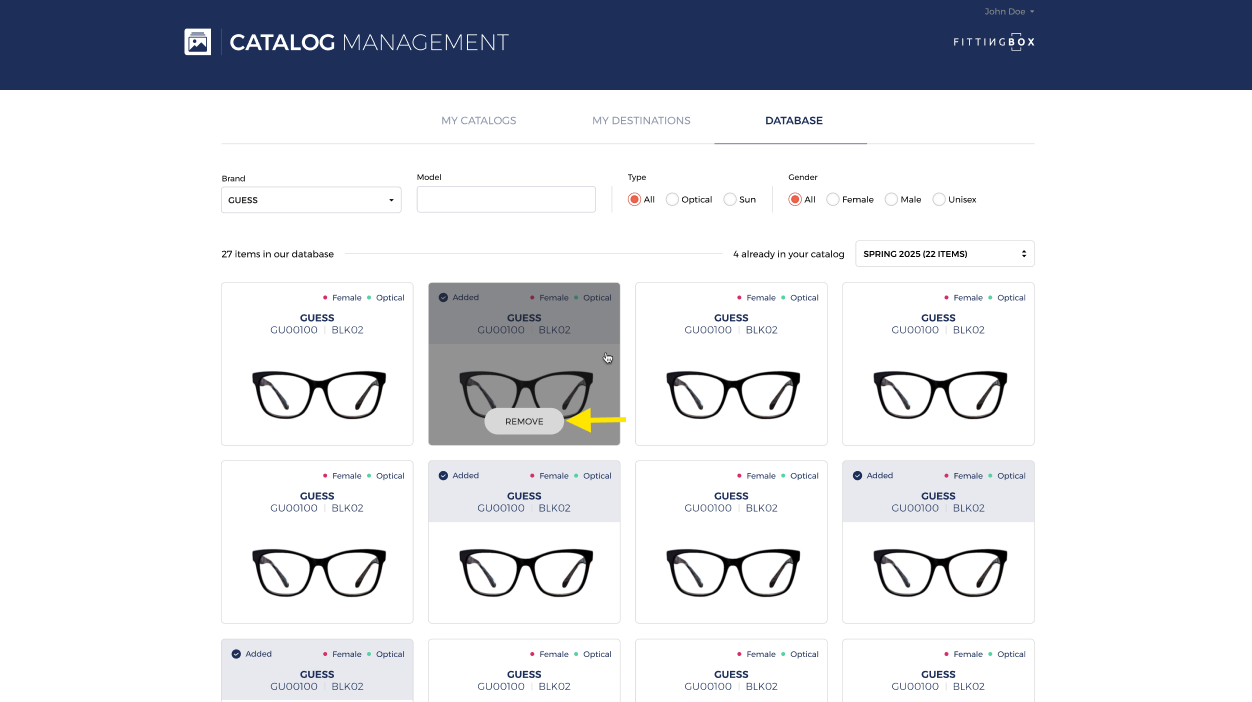
On DATABASE tab, you will find the following details:
Brand: A dropdown list of all brands from FITTINGBOX database.
You can select only one brand.
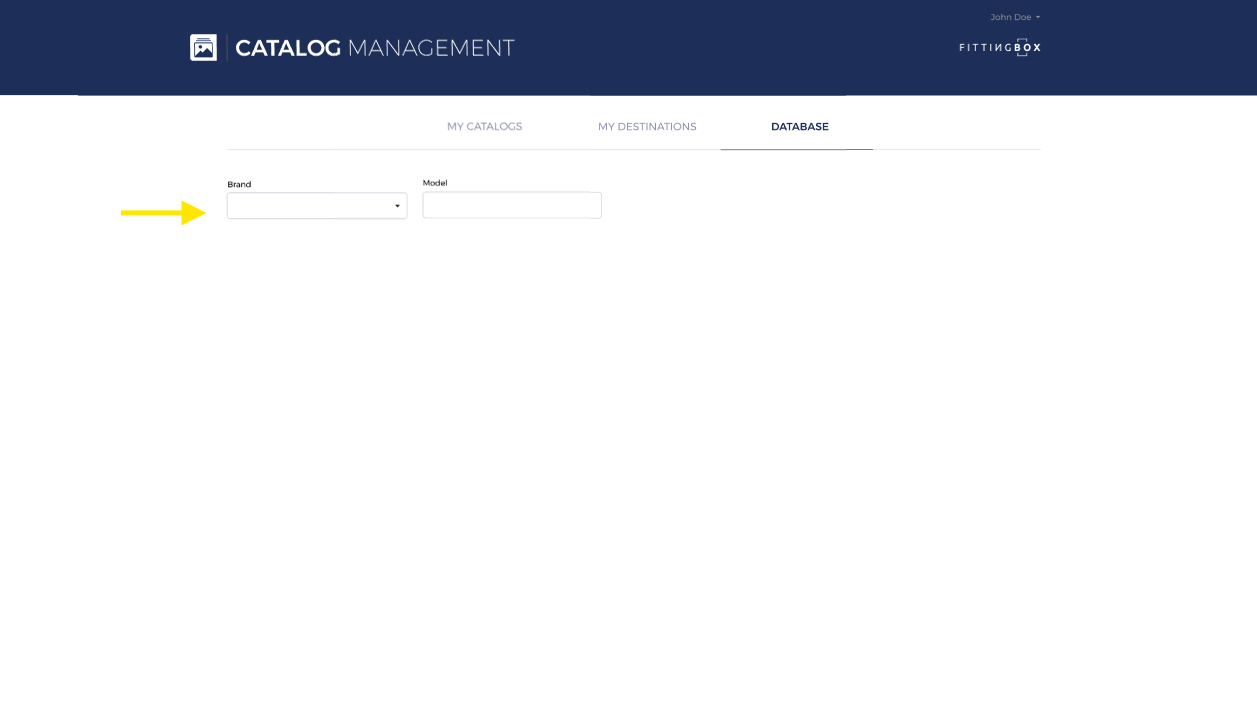
Model: An input field to enter the model.

After Selecting a Brand, the following options will be displayed:
Type filter with the options: All / Optical / Sun.Gender filter with the options: All / Female / Male / Unisex.
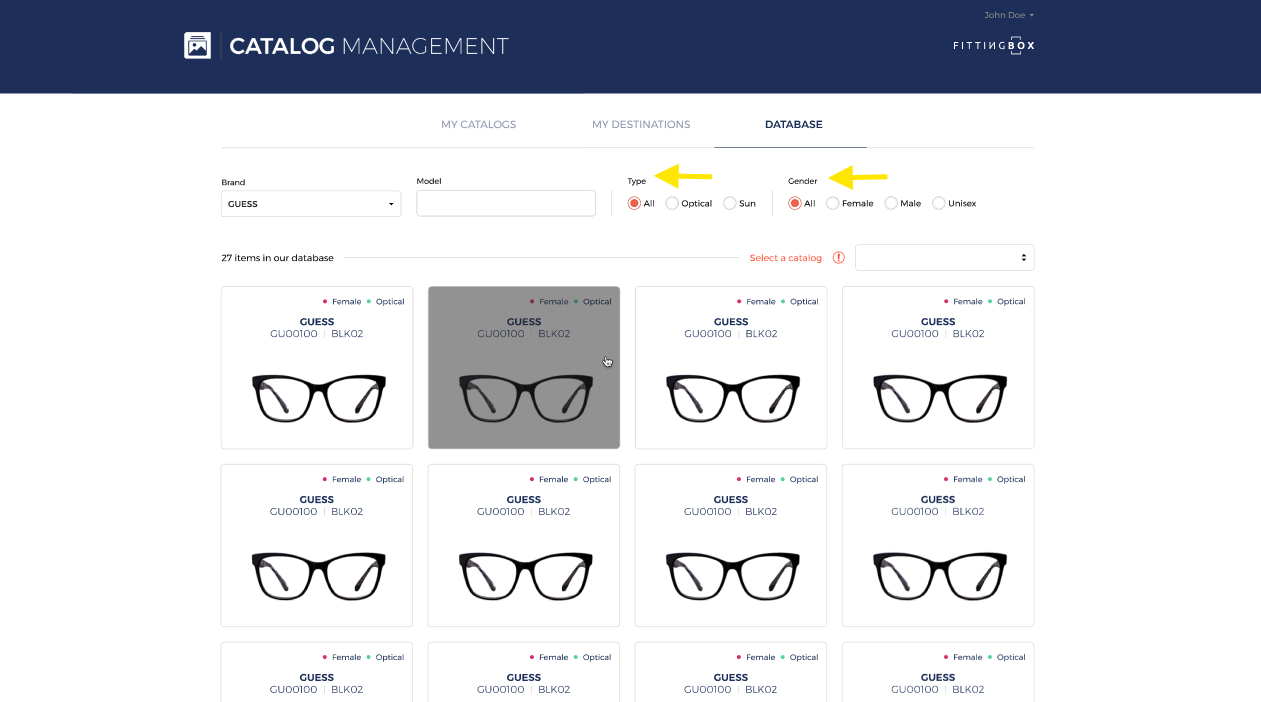
The number of items found in the database.
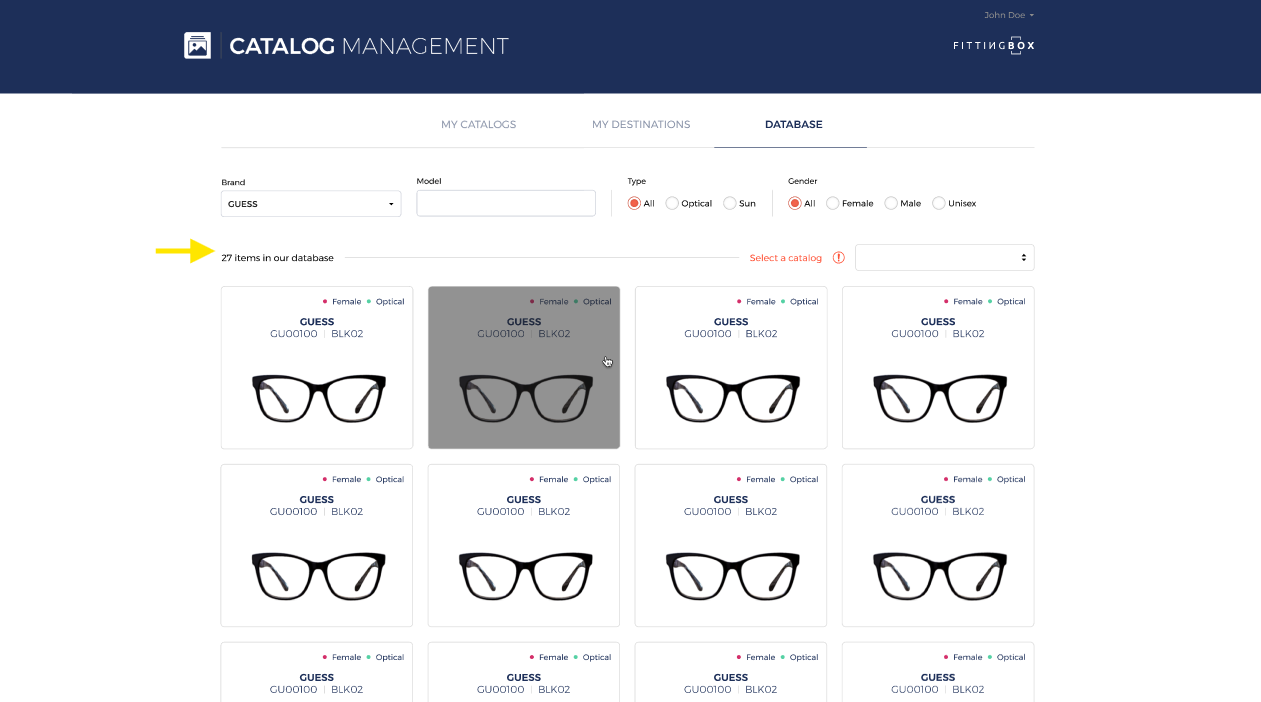
A dropdown list of the catalog names you’ve already created.
Cards for the items found in the database containing the following details:
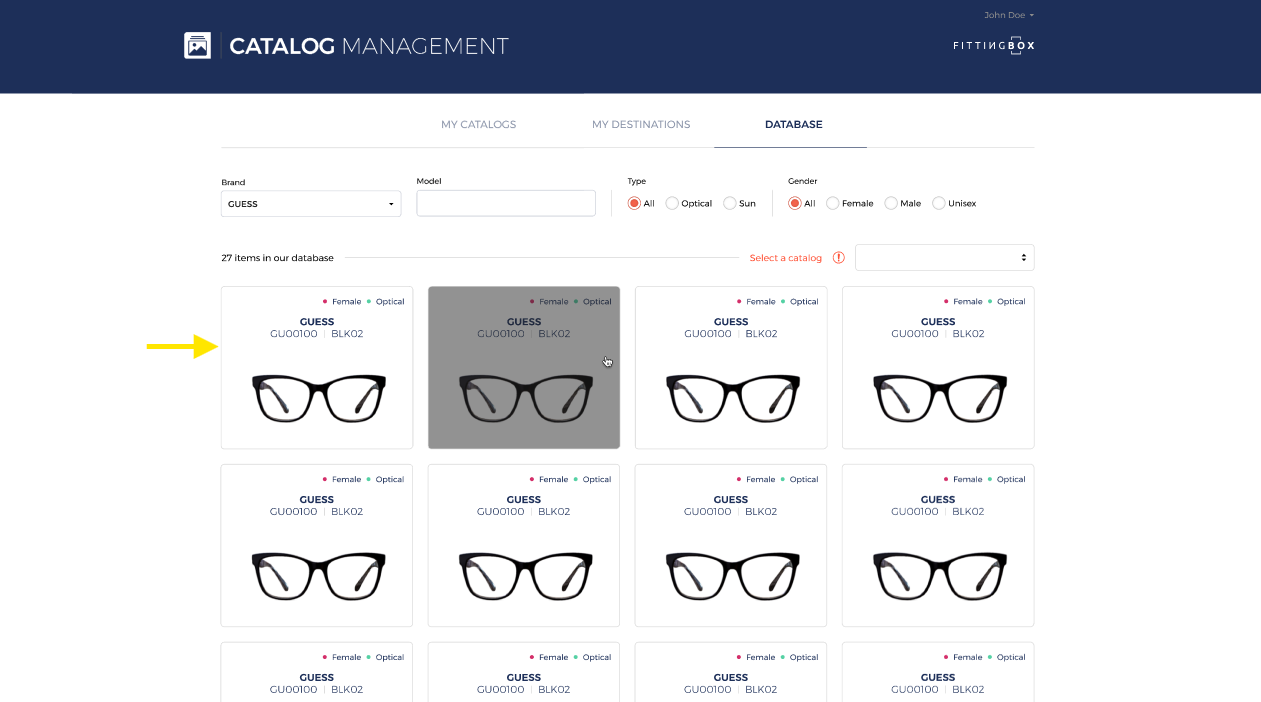
Gender and Type displayed at the top-right of the card.
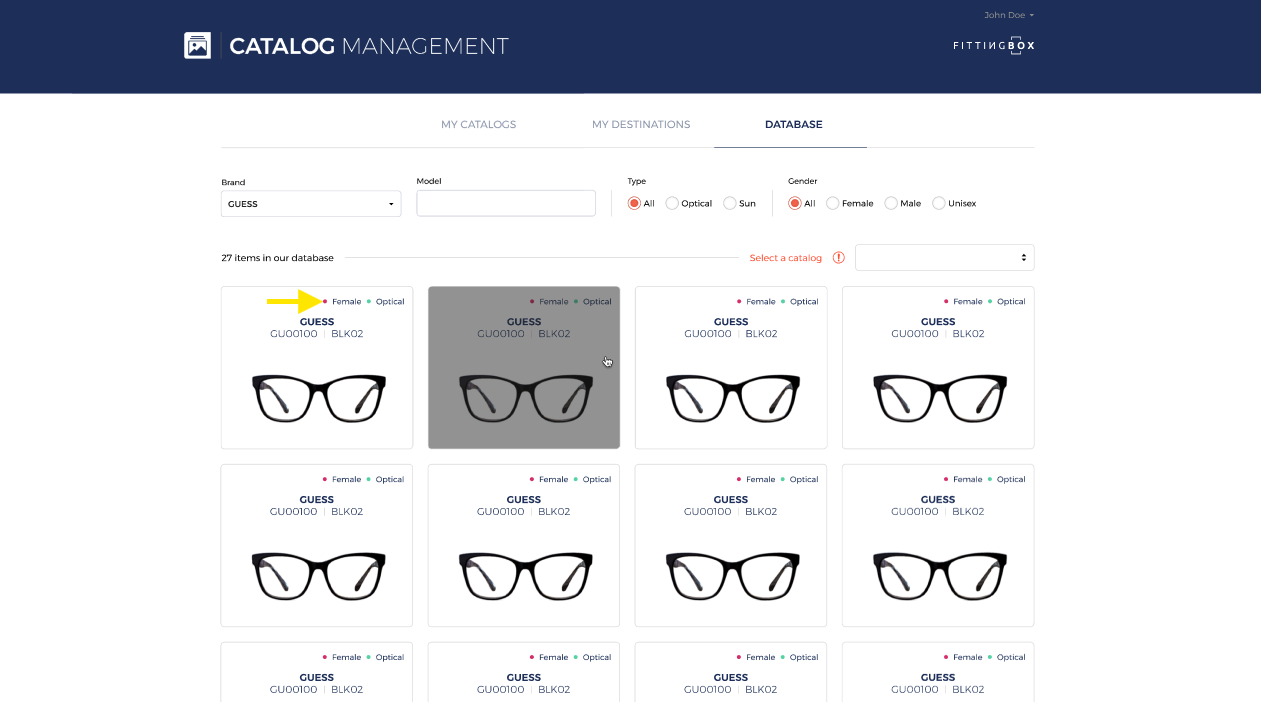
Brand name displayed in the middle.

Model displayed under the brand name.
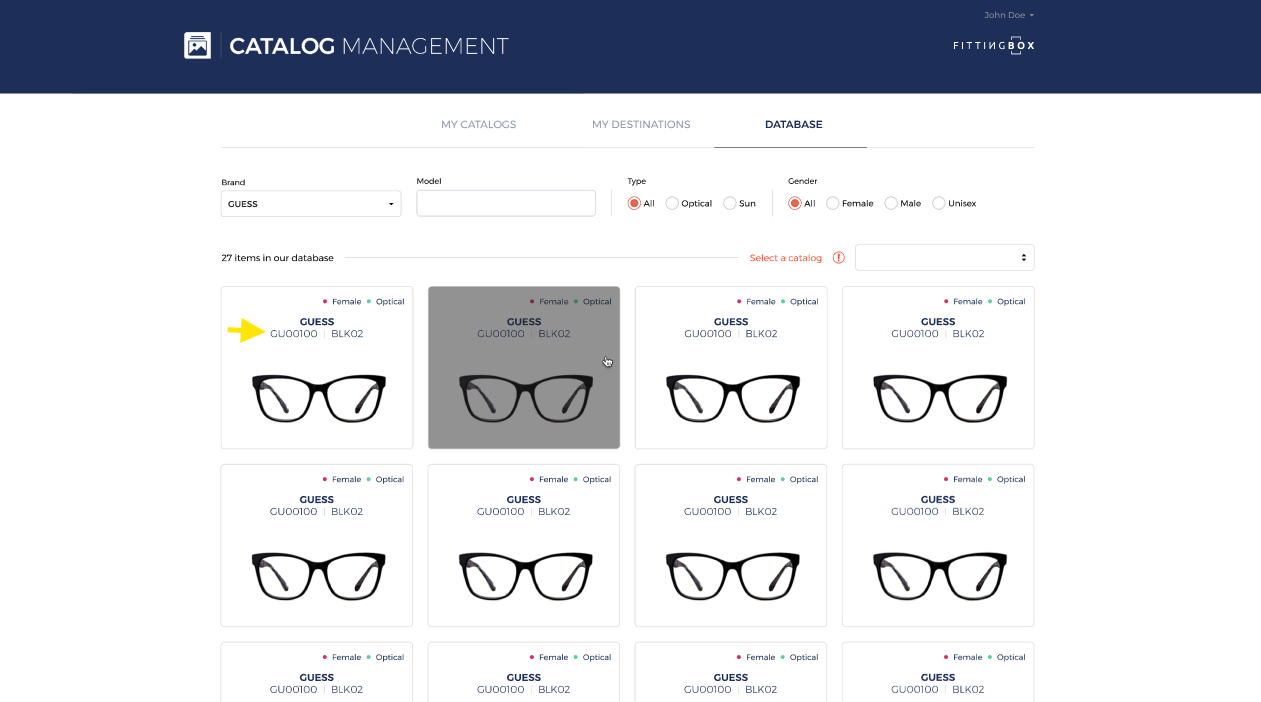
Color displayed next to the model.
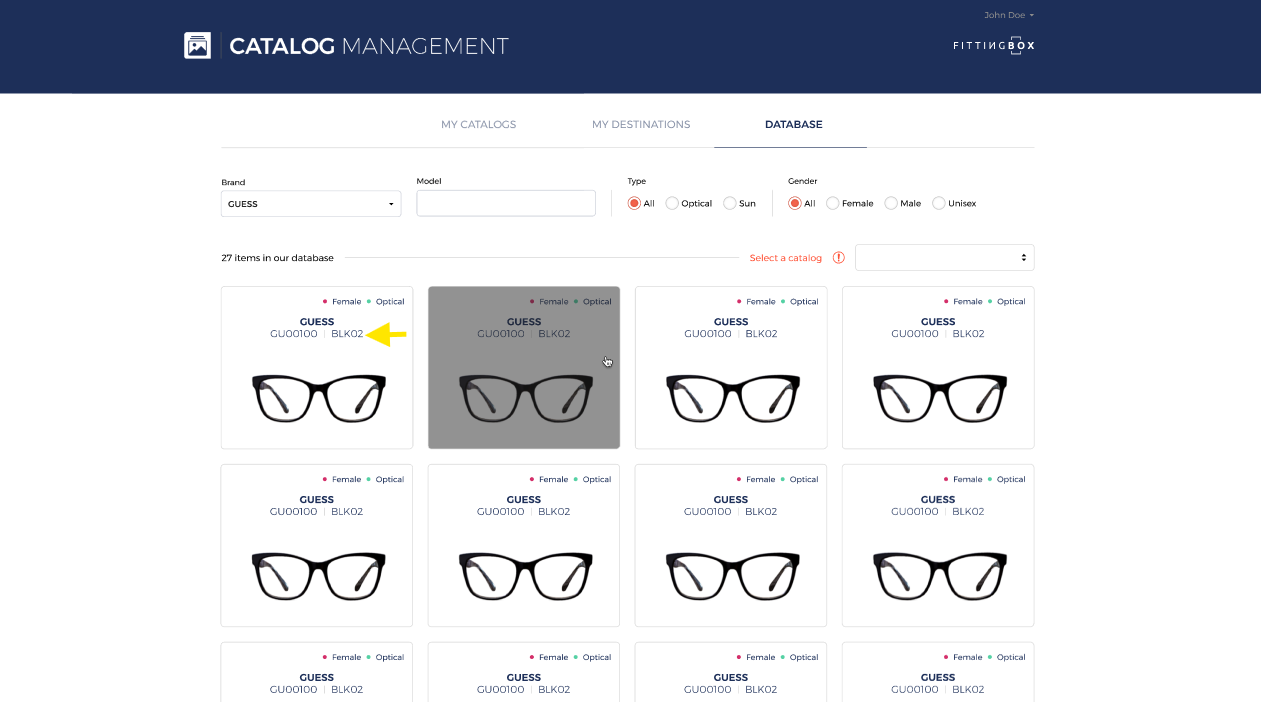
The item’s mini photo.

“Select a catalog” with a dropdown list of your catalogs.
The catalog selection in the dropdownlist is mandatory.
If you haven’t selected a catalog, you won’t be able to add items.

To add items to your catalog, hover over the item card you want, then click on ADD.
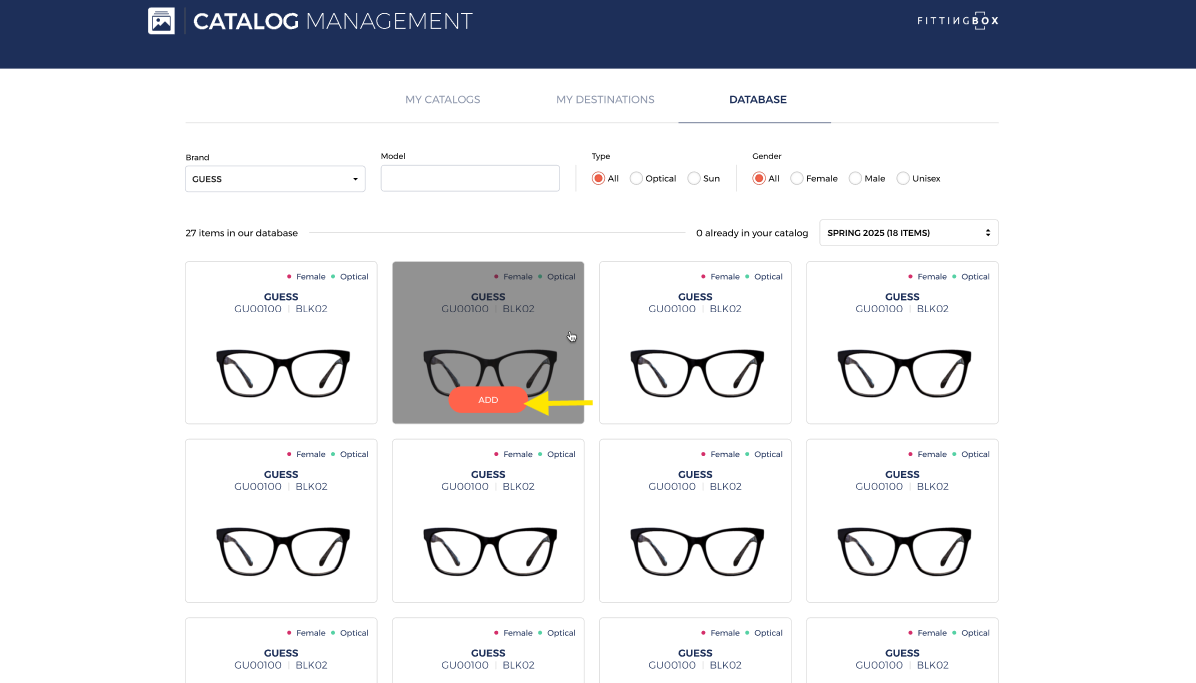
When an item is added to your catalog, the number of items in your catalog will be updated automatically.
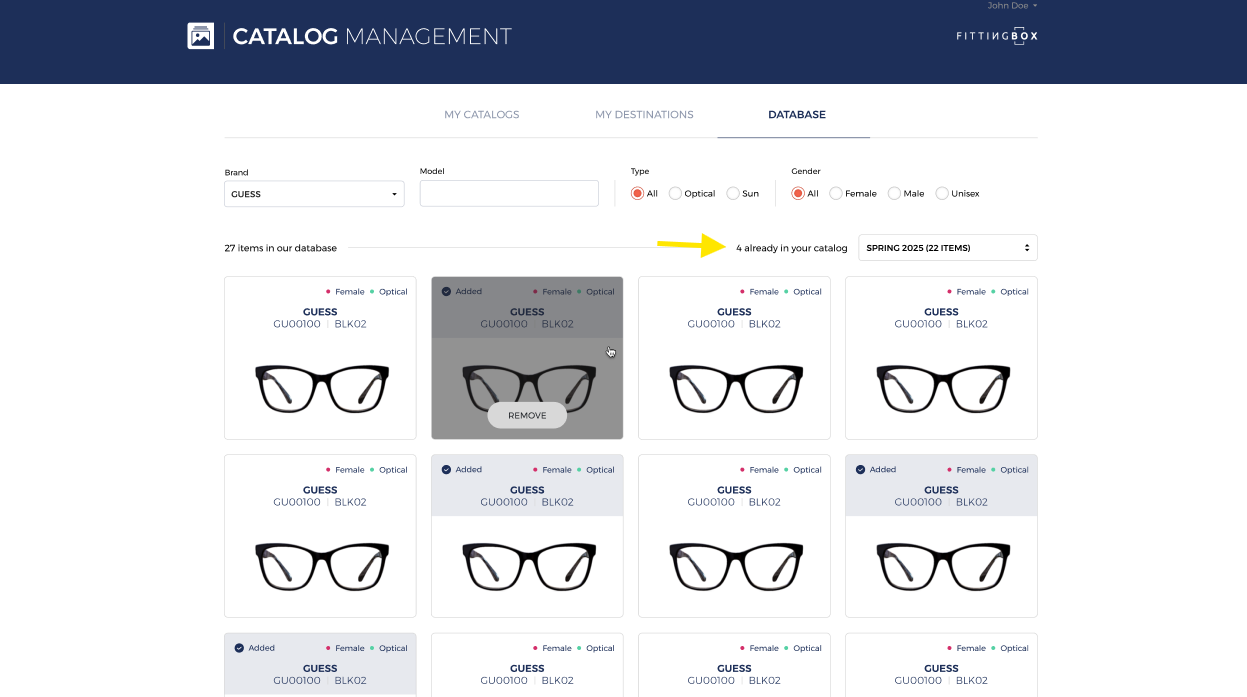
When you hover over a card for an item that has been added to your catalog, a Remove button will appear.
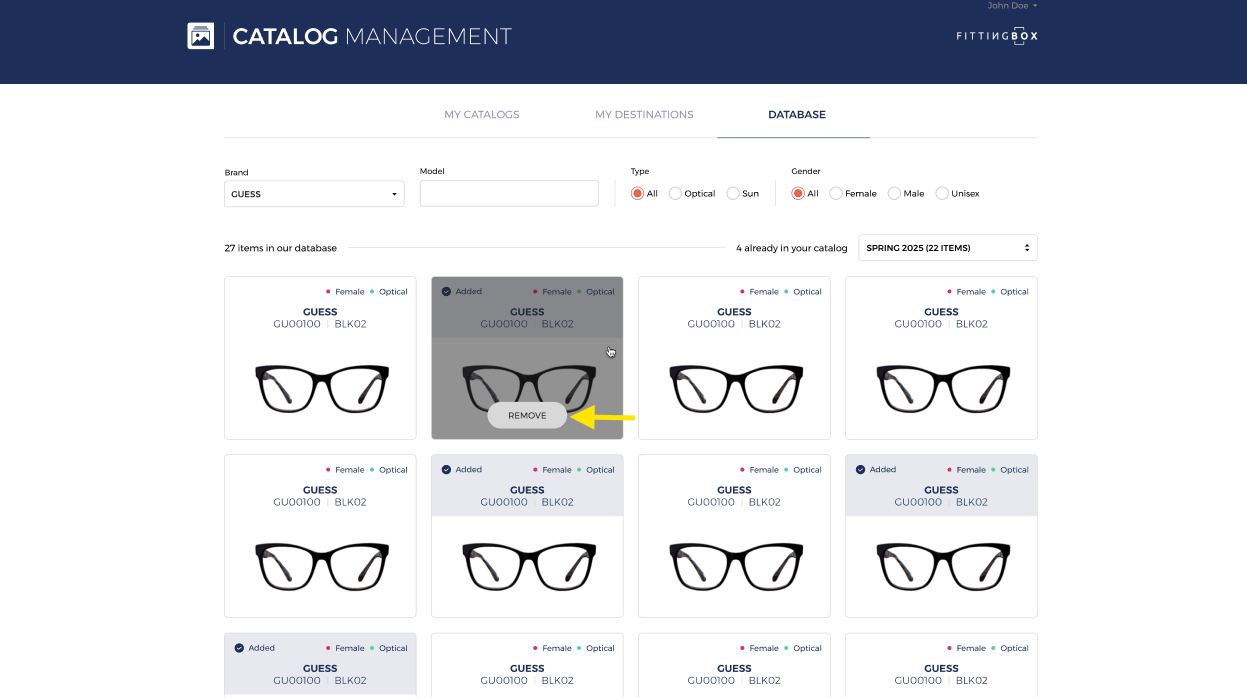
By clicking on the Remove button, the item will be removed from your catalog.
When you search for a brand in the database, the items already added to your catalog will always be displayed.
These items will be marked with the status “Added”.
How to manage my DESTINATION URLs?
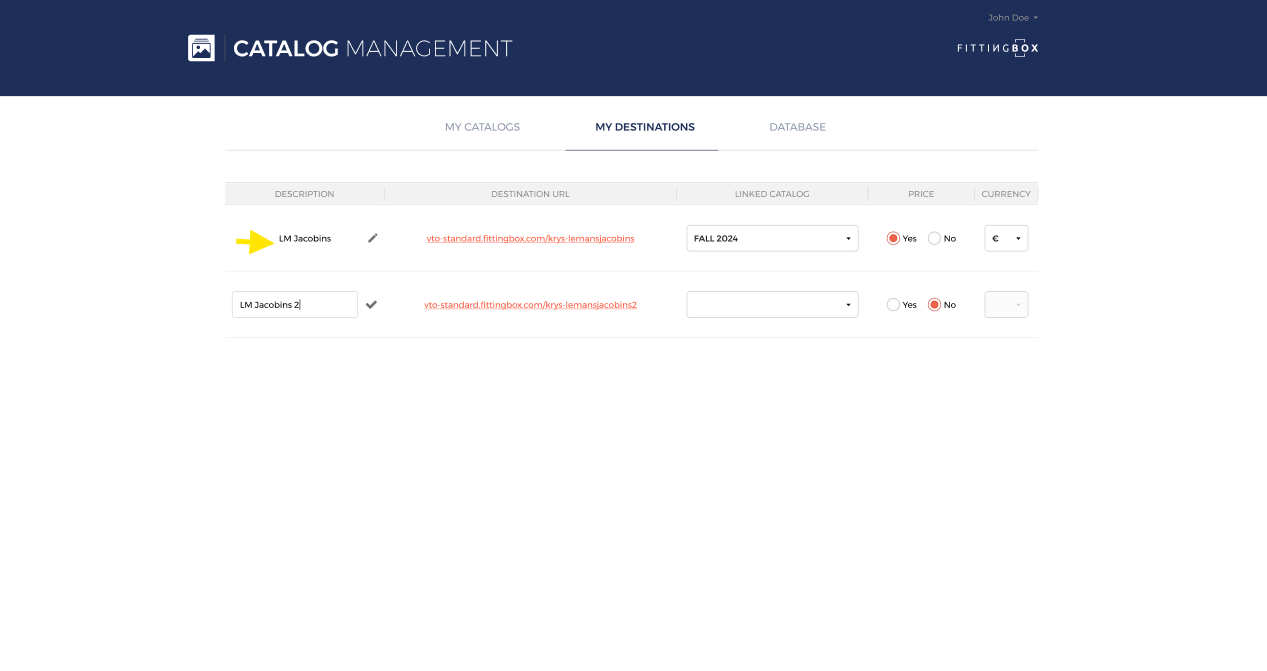
Navigate to the Destinations tab to view the following details:

Description: It’s about the description that Fittingbox provides for your license during its configuration.
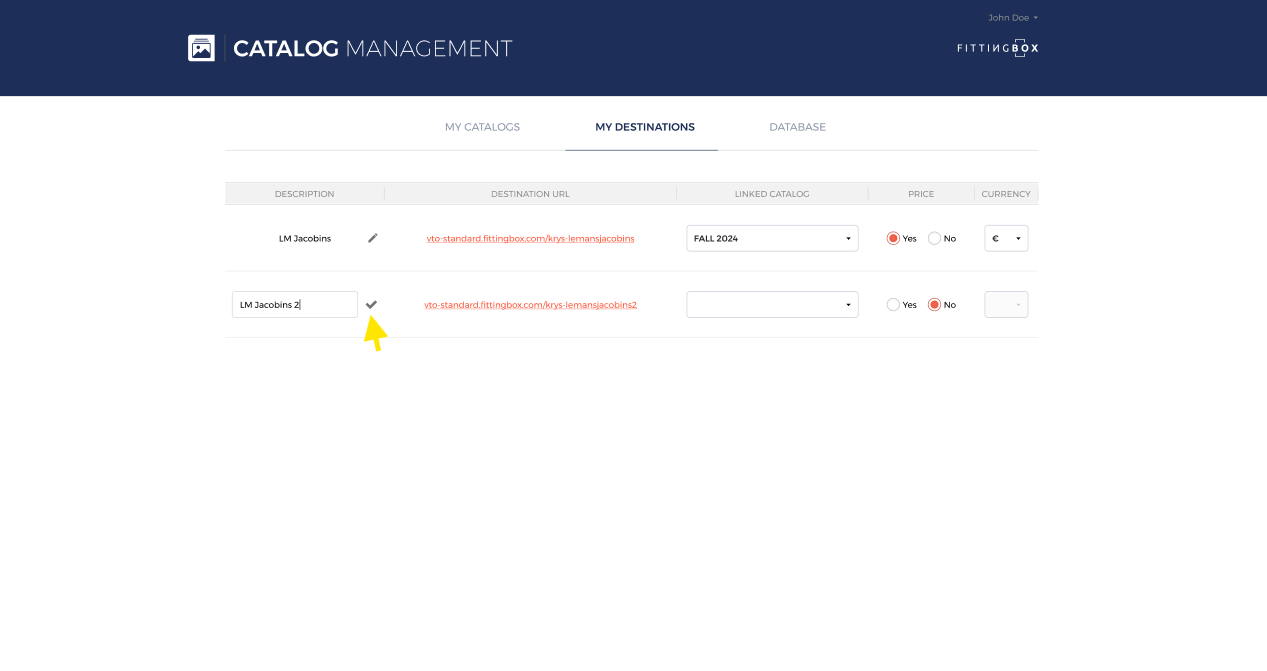
Click the pencil icon to edit the description.
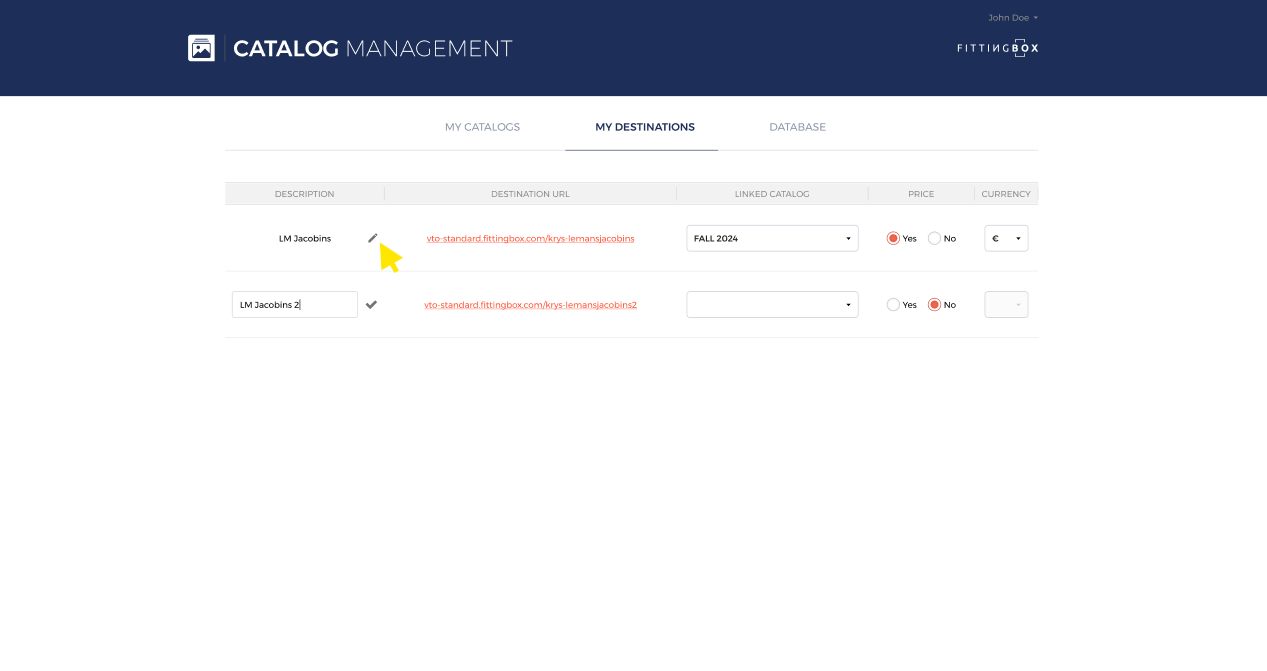
After editing, click the checkmark to save the changes.
 Destination URL: It’s about the URLs you can use on your suite to display your catalog.
One license = one Destination URL.

Linked Catalog: A dropdown list showing all catalogs created in My Catalogs.
You can use the dropdown list to associate or dissociate catalogs from the DESTINATION URL.
Price: Radio buttons with options Yes or No.
By clicking on NO, the price won't be displayed on your catalog.
Currency: A dropdown with options $ or €.
When Price is set to No, the Currency dropdown will be grayed out, and no prices will be displayed in the published catalog.
License Deactivation
If your license has been deactivated , the corresponding DESTINATION URL will be removed from the Destinations tab, and the active catalog linked to that destination will become inactive.