Virtual try-on Photography
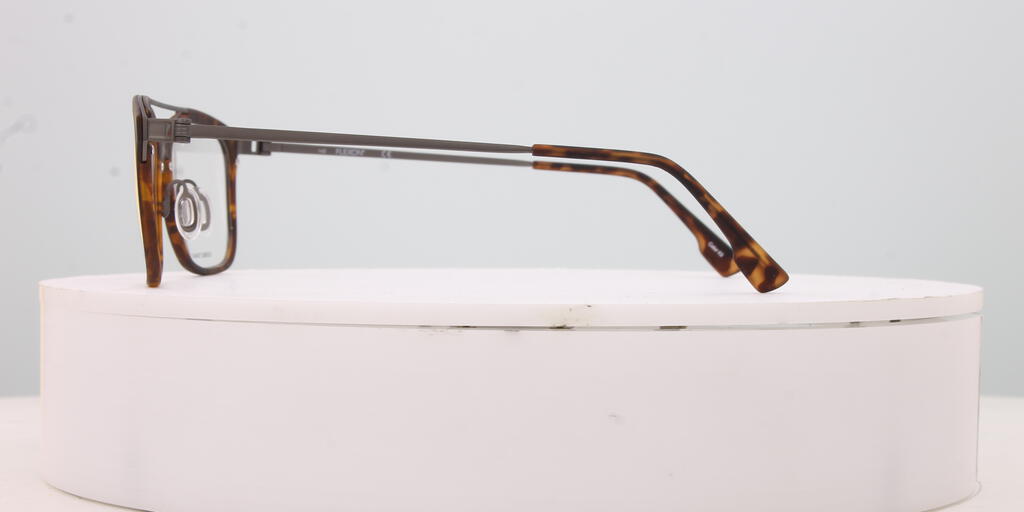
Since these assets are seen from faraway and not all details can be seen clearly, elements are simplified and not all details are included on the frame. In particular, no attention is given to the inside of the frame as it is not visible while on the face.
| PRODUCT TYPE | DESCRIPTION | PHOTOGRAPHY REQUIREMENTS | ADDITIONAL NOTES |
|---|---|---|---|
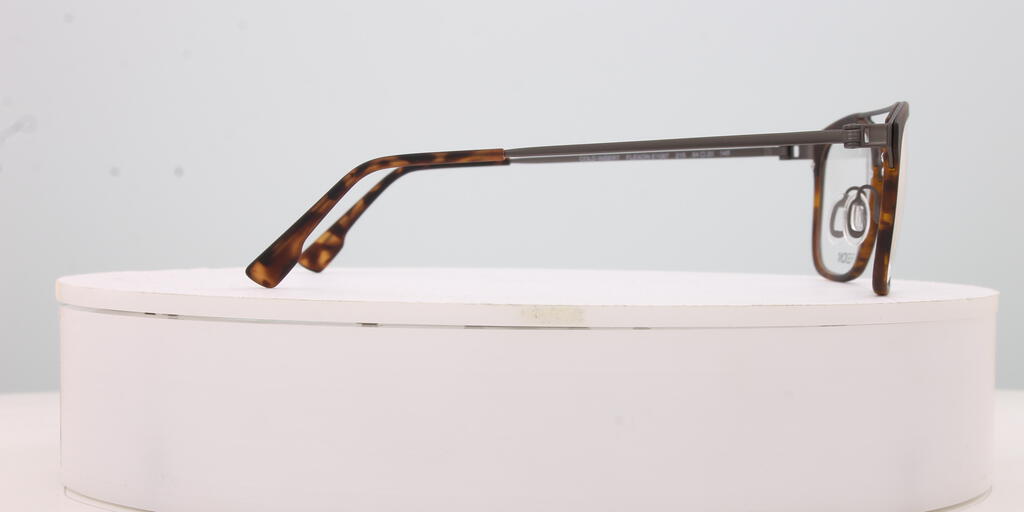
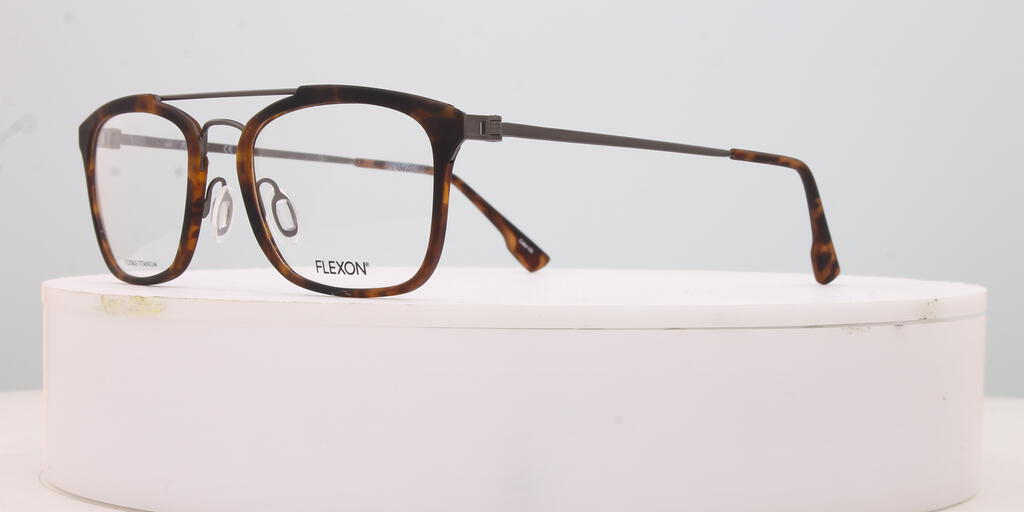
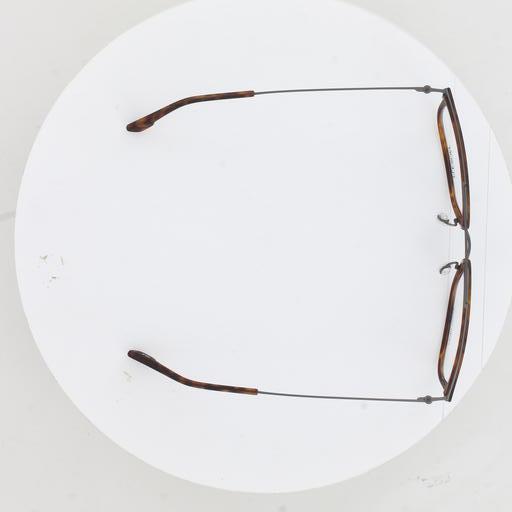
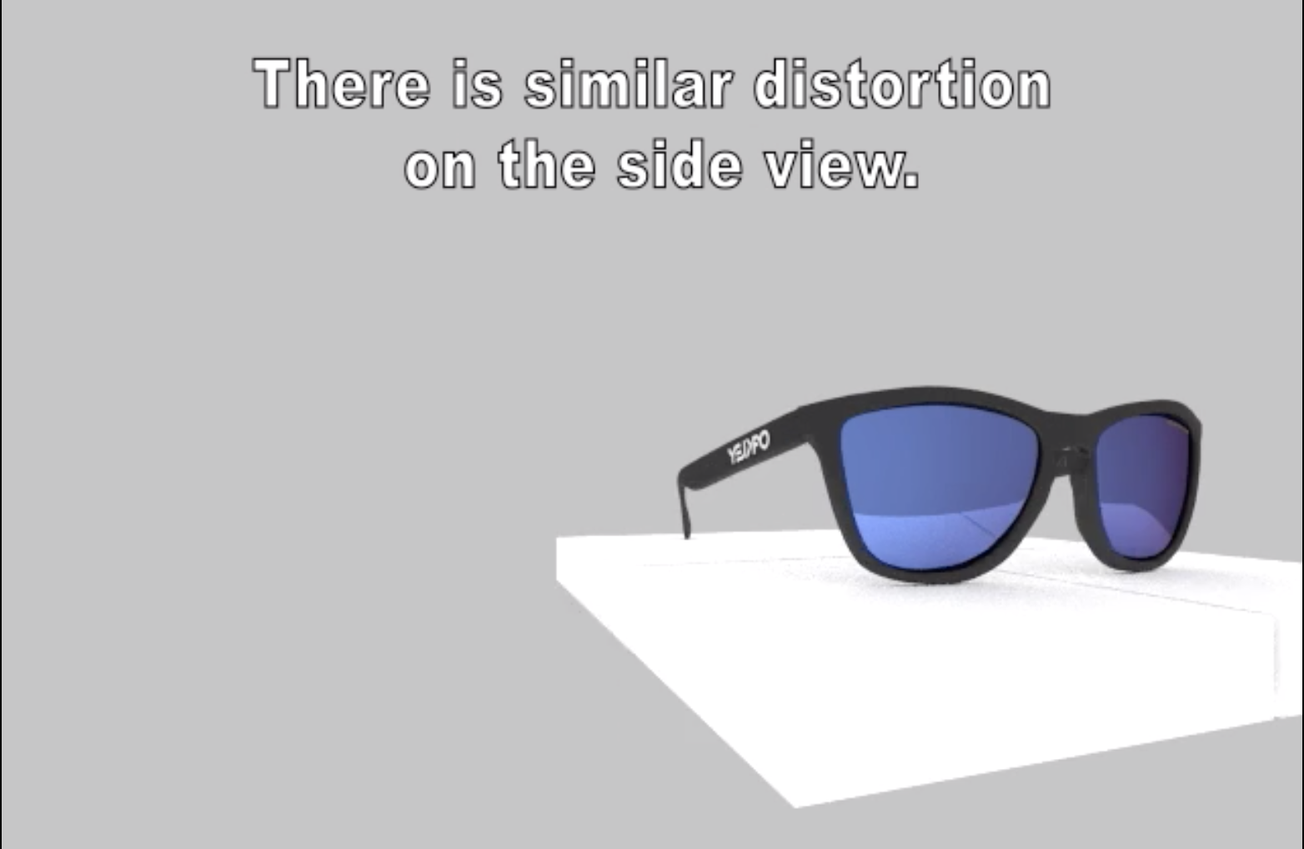
| VTO ONLY | Minimal Inputs used for VTO asset creation only. | 1. Frontal 2.Left Temple 3. Right temple 4.Top-down* (preferred) 5.45° Angle (preferred) |
*if all pairs are symmetrical in external details/branding, a single temple shot is acceptable *Top down image Required for Wraparounds |
- Each image file size can be no more than 5MB
- Ensure imagery includes EXIF data (in particular focal length)
- Ensure light of frames in photography matches how you would like the frames to be portrayed in the digital assets (e.g., backlit versus natural lighting)
- The number of photos for each SKU must be the same
- The naming convention must be consistent across SKUs and angles (e.g., 123456_1, 123456_2, 123456_3)
- The cropping and size of frames must be consistent
- Images must be provided as .jpg or .png
- often times there is a 45° shot provided from the manufacturer as well, this can be helpful to include if available.
Actual photography is preferred over 3D renders

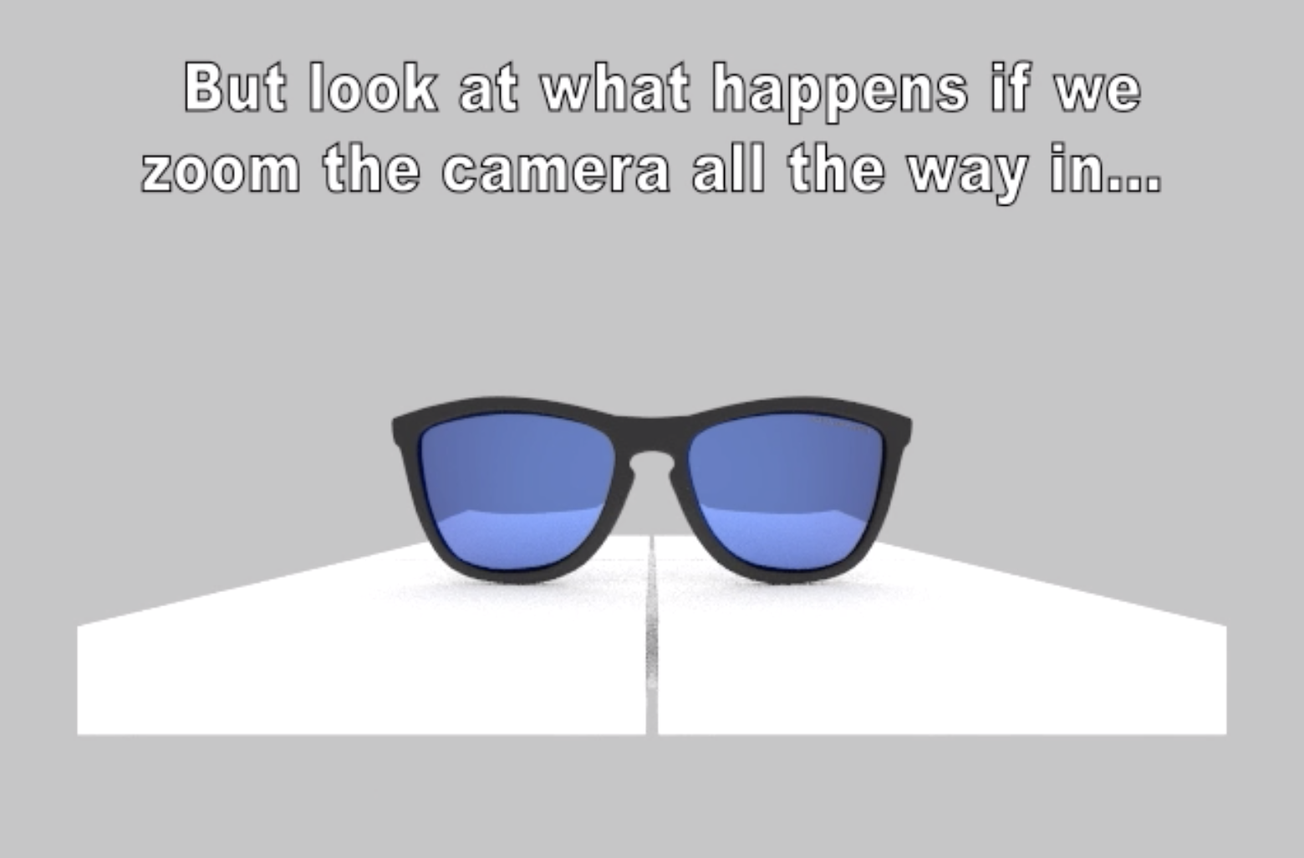
Minimizing Perspective Distortion
All photography must be taken on the same plane as the glasses and meet the following requirements to minimize distortion (i.e. warping) and result in Virtual Eyewear with inaccurate shape and measurements.
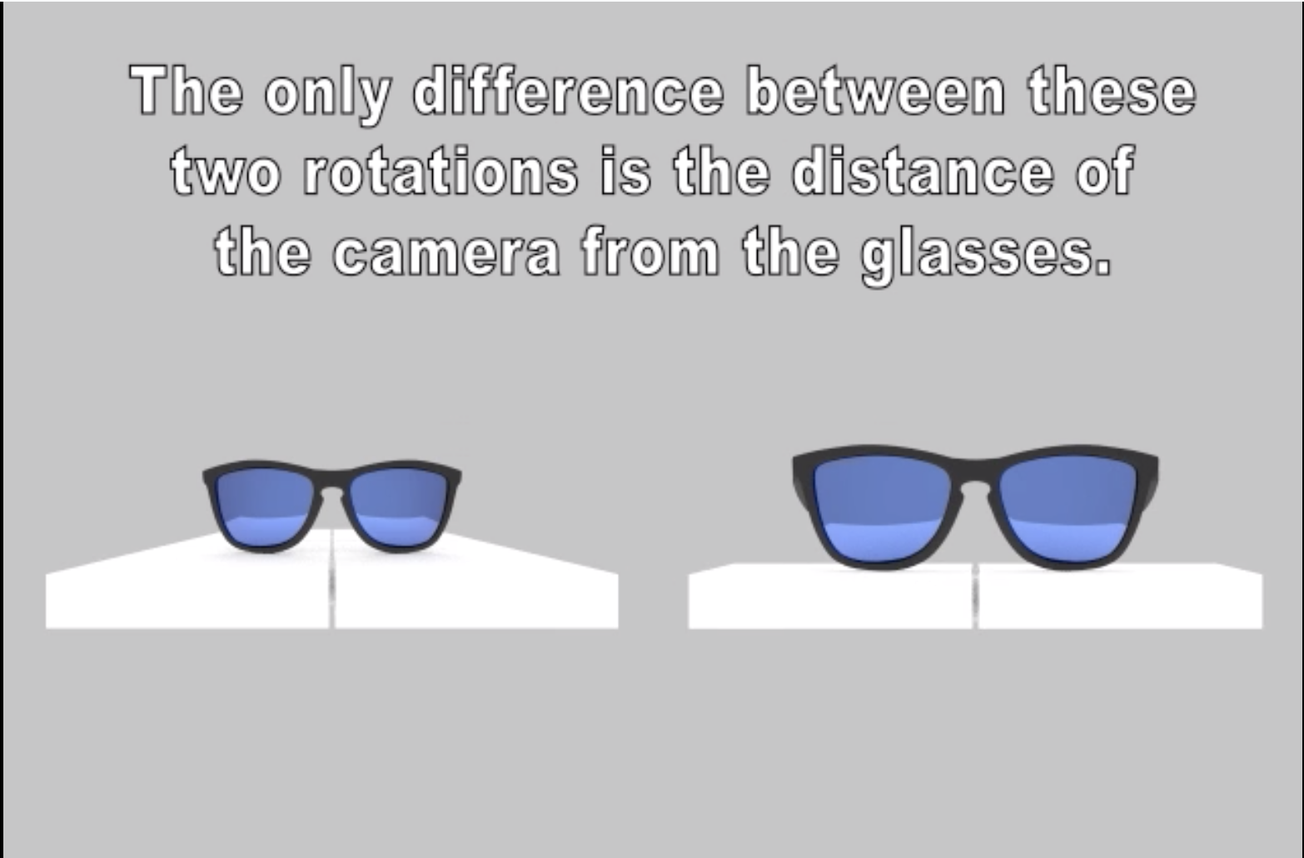
To minimize distortion, it is important for the camera to be as far away from the glasses as is practical. To keep the glasses a reasonable size in the photo, use the highest focal length lens available. We recommend at least 200mm.
Focal LengthNote that in a recent test, a focal length of 200 mm requires us to have the camera at least 61 inches away from the glasses and a focal length of 300 mm required us to have the camera at least 91 inches away. The key is for the photographer to use a large focal length and be as far back as possible until the glasses are in the frame.
- Ensure glasses are on a flat, horizontal plane
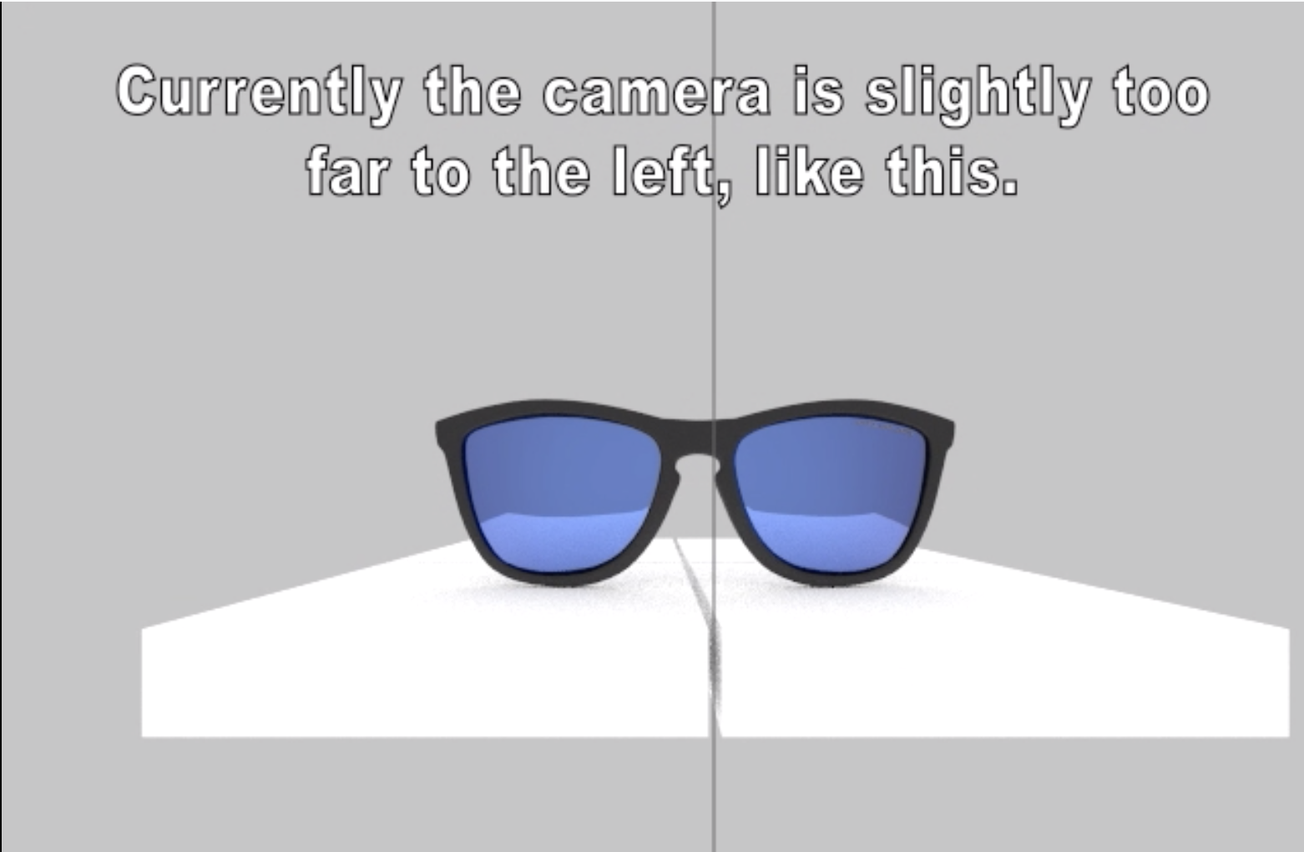
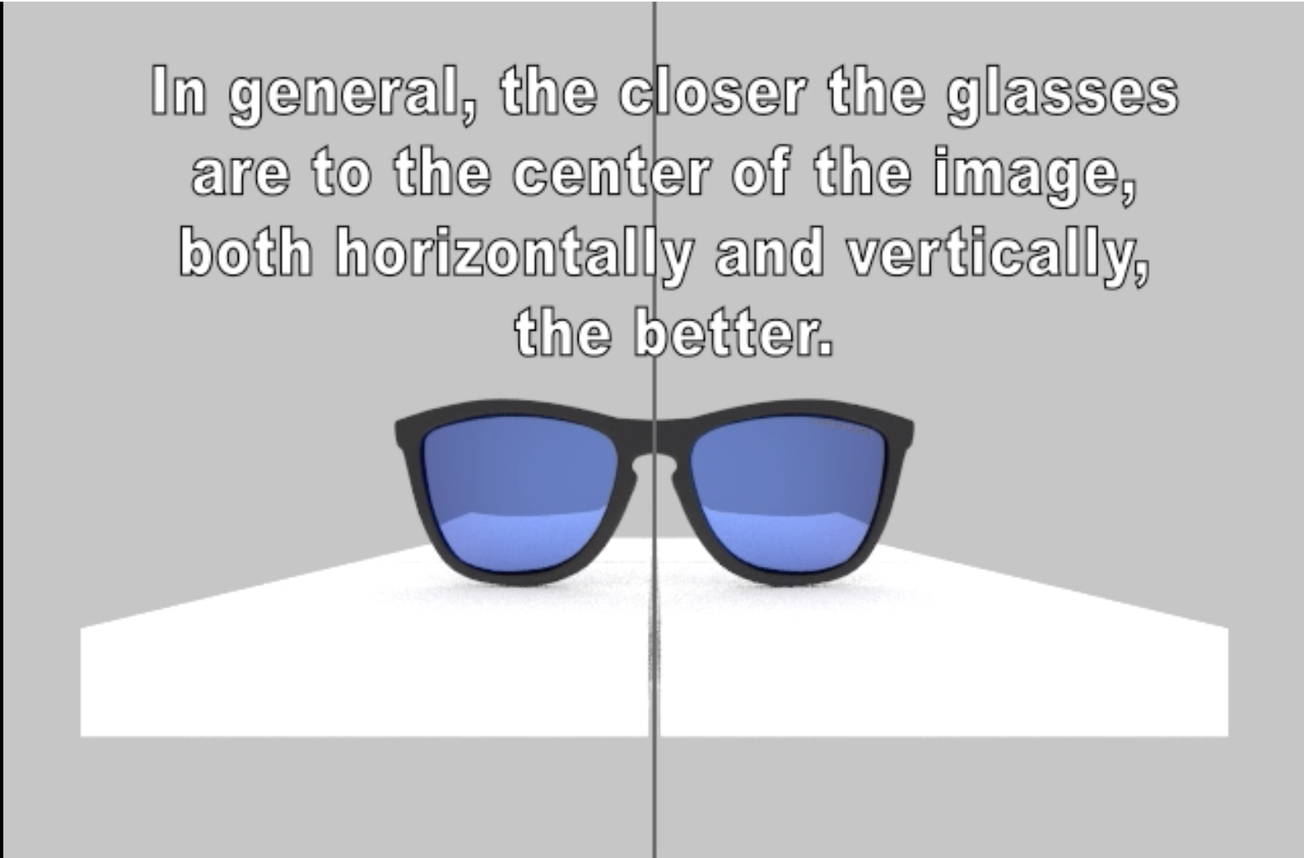
- Mark the horizontal center of the bridge (that splits the bridge)
- Position camera, to ensure glasses are centered vertically in the frame
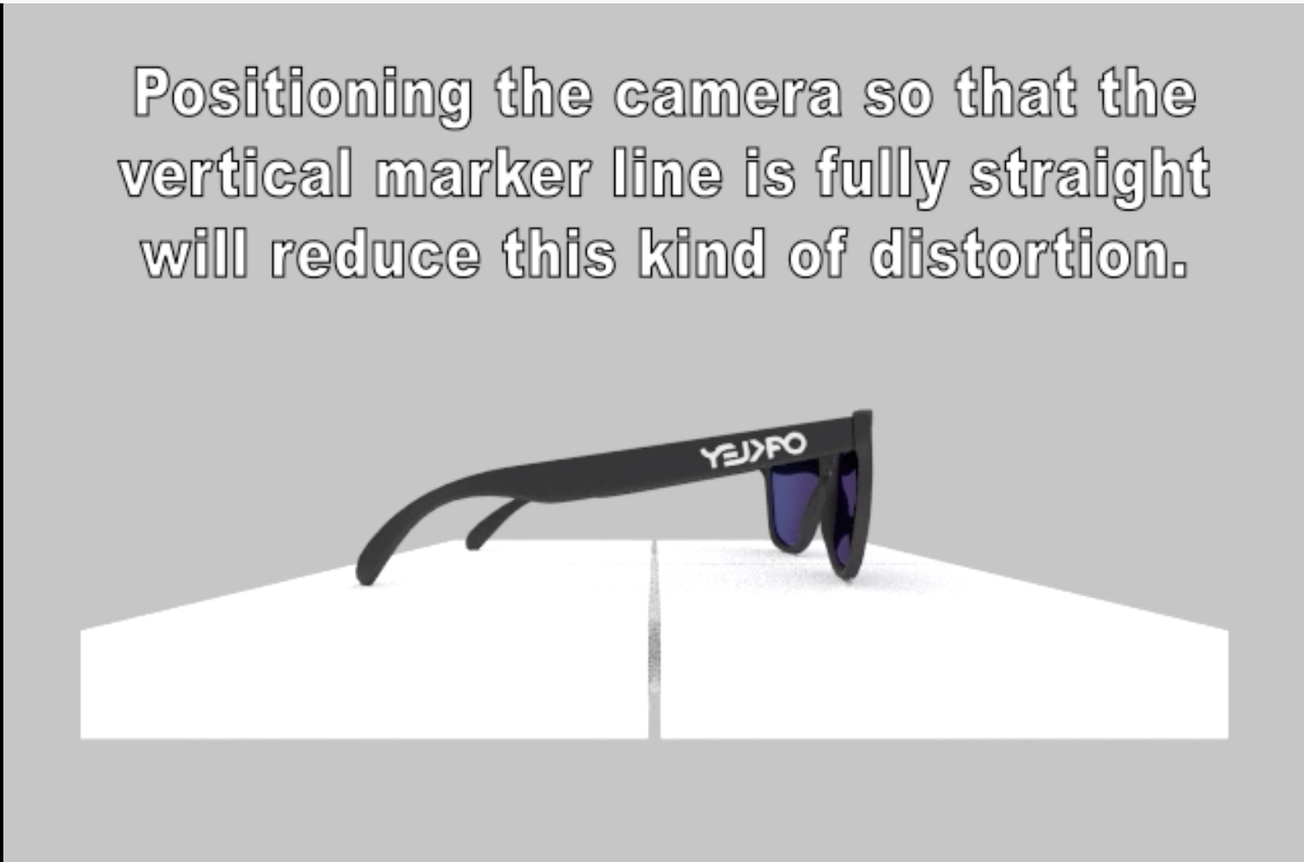
- Ensure the camera is level
- If the tilt is severe enough and glasses are mirrored across the center (as is typical when modeling), then significant distortion can be introduced).
Advanced Guidelines for Tier 1 SKUs
The list of requirements in this section will also help for following some of the best practices to minimize the distortion such as making sure that the camera is level and the glasses are centered horizontally and vertically.
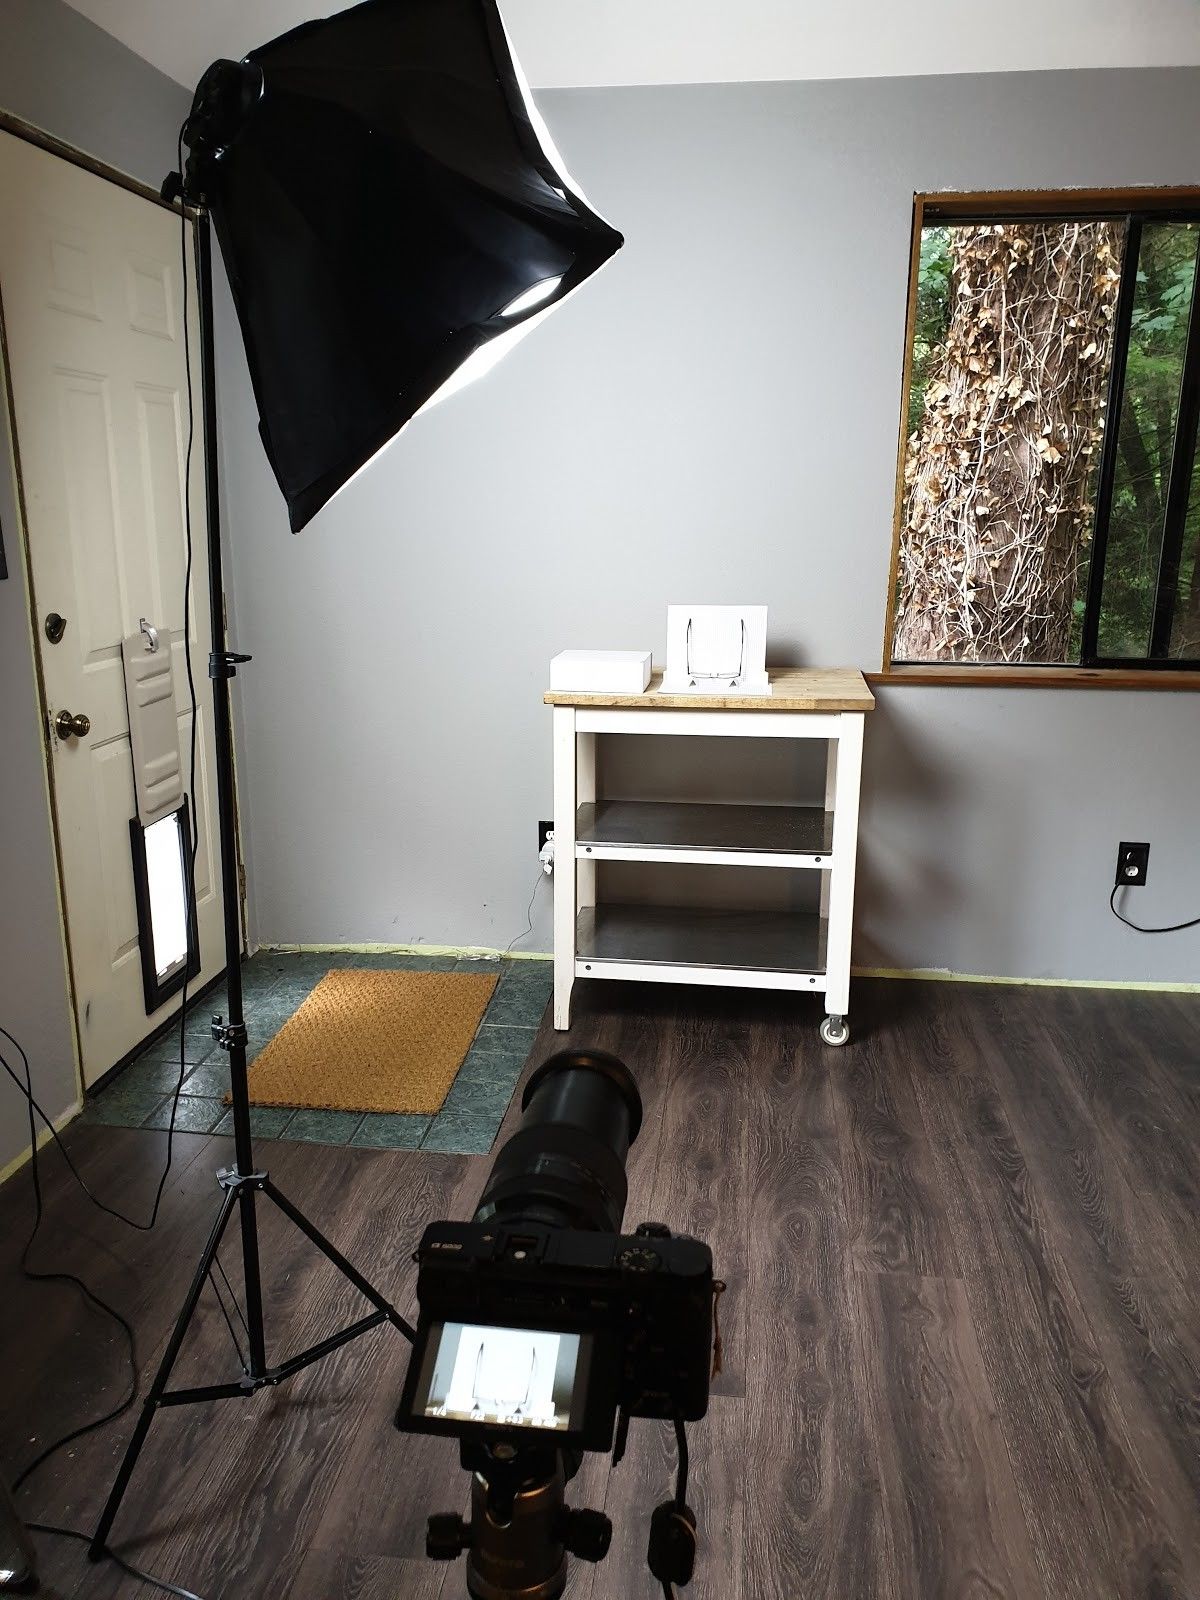
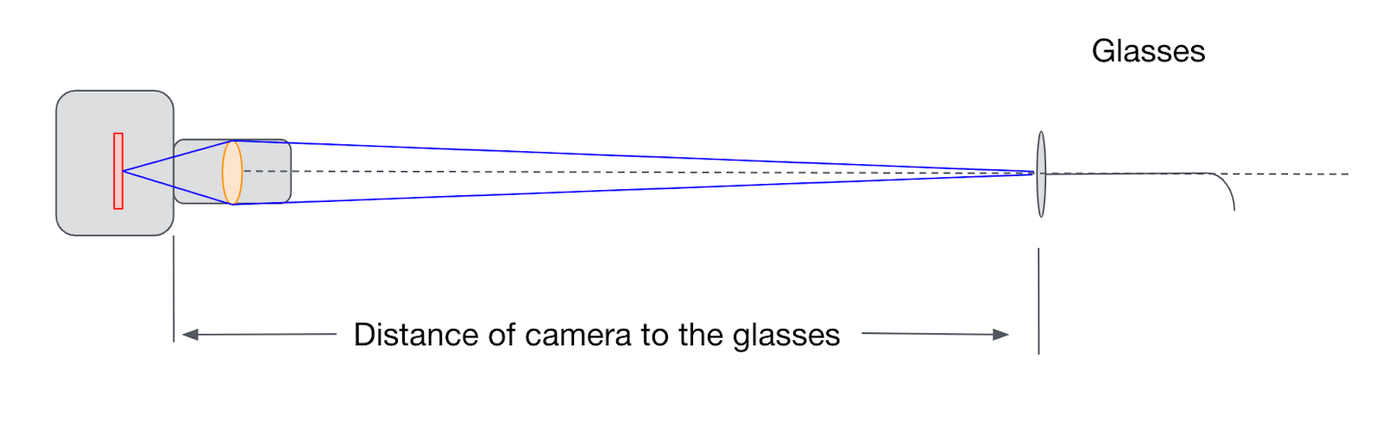
The goal of the following instructions is to make sure that the center of the camera sensor and the center of the glasses are aligned on all images. To achieve this goal the first step is to use a tripod or surface where the camera position is fixed as seen in the setup figure below. In order to ensure this for all views, two auxiliary objects are needed; a riser block (75 mm tall) and riser triangles (20 mm tall or 23.1mm each side) shown below.
Please follow the procedure below to setup the camera distance and camera height to the glasses:
Setup the glasses in the top-down view first (using the riser triangles) and move the camera back until the whole pair of glasses is visible with good margins. That will set the distance of the camera to the glasses. The distance of the camera is defined as the distance from the glasses to the camera body-lens connection point. The illustration below shows how to take this measurement.
Before adjusting the camera height, try to point it as straight ahead and level as possible.
Put the riser block on the surface and place the glasses on it starting from the front view.
Starting with the camera lower than the glasses, raise it until the bottom of the glasses is visible. This should make the center of the camera and the center of glasses closely aligned. However, if there is any height difference, then this will define the height of the camera with respect to glasses. This can be measured by subtracting the height of the glasses center to the floor from the height of the camera lens center to the floor.
With this setup, the camera can be left in one place for the entire photoshoot. Please report the camera distance to the glasses and camera height with respect to glasses together with the images
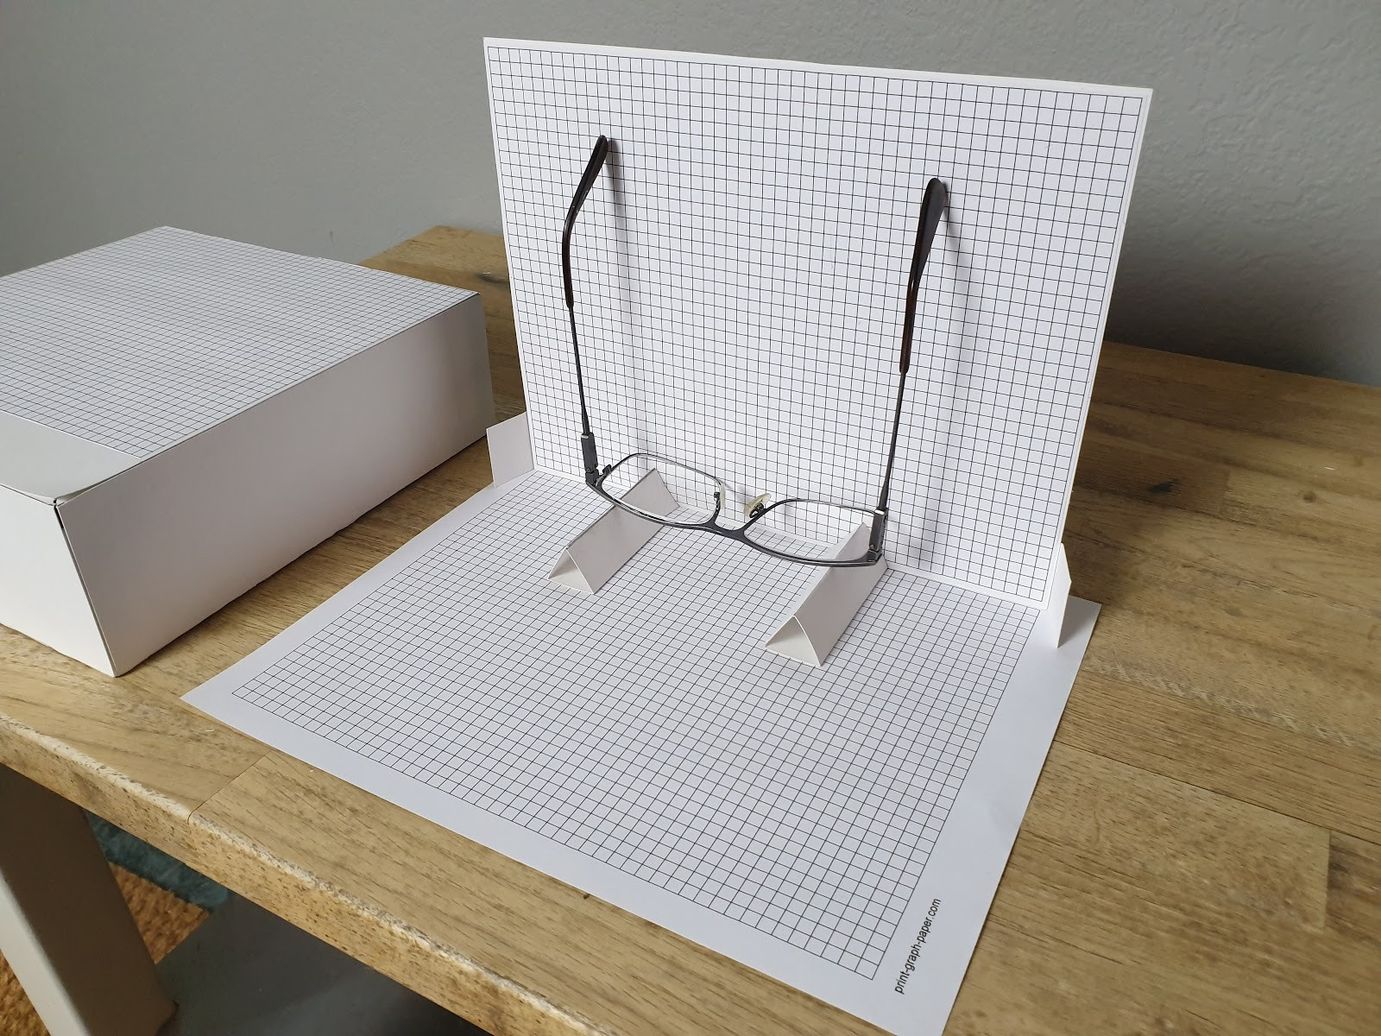
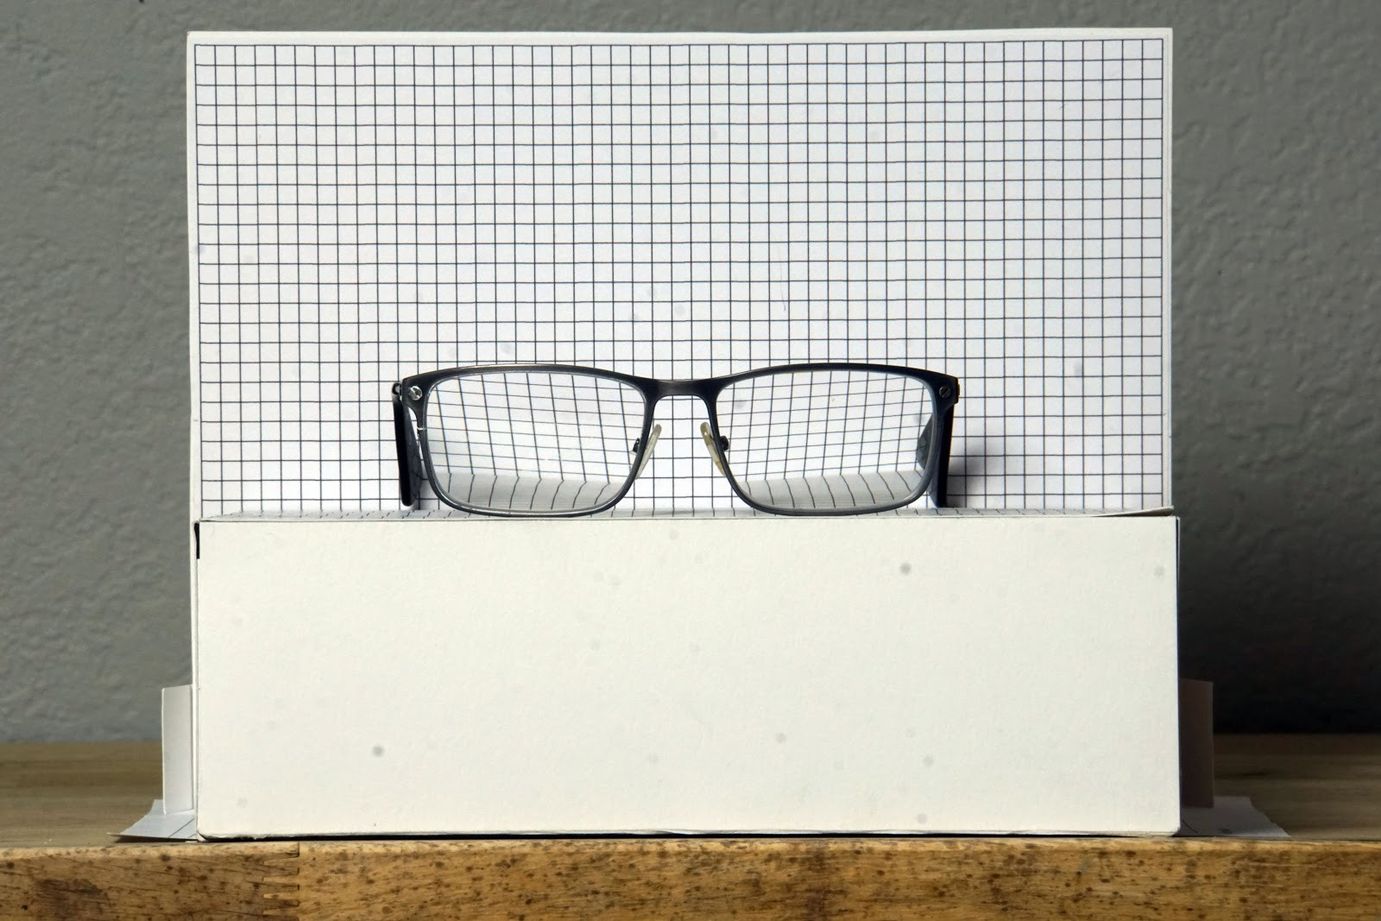
The following images are examples of images taken with the instructions in this section. They also demonstrate the usage of graph paper.

A caliper measurement of the frame width is required in order to scale the 3D model to real-life dimensions. Ideally, the measurement can be made at the hinge location on the temples. An additional photograph showing the exact location where the caliper measurement is taken is required for accurate scaling.
Identify the location where the front frame meets the temple arms.
- Measure the width of the front frame at the location the front frame meets the template arms.
- If the temple arms overlap the front frame, the arms should be included.
- The measurement should be at the top of the front frame.